Easy Homemade Fruit Leather Recipe-Sweet Healthy Treat
Homemade fruit leather is more than just a nostalgic treat; it’s a delightful way to capture the vibrant essence of fresh fruit in a chewy, portable snack. Who doesn’t remember unwrapping a brightly colored strip of fruit leather as a kid? That pure joy is easily recaptured in your own kitchen! We love homemade fruit leather because it’s incredibly versatile, allowing us to use seasonal produce and tailor the flavors to our exact preferences. Unlike store-bought versions that can be laden with artificial ingredients and added sugars, our homemade fruit leather recipe lets you control exactly what goes in, making it a healthier and more delicious option for lunchboxes, hiking trips, or just a satisfying afternoon pick-me-up. The simple process of dehydrating pureed fruit results in a wonderfully intense, naturally sweet flavor that’s simply irresistible.
Why You’ll Love This Recipe:
Healthy & Wholesome
Customizable Flavors
Easy & Fun to Make
Homemade Fruit Leather Recipe
There’s something incredibly satisfying about making your own fruit leather. It’s a fantastic way to preserve fresh fruit, avoid the excessive sugars and artificial ingredients found in store-bought versions, and create a healthy, delicious treat that kids and adults alike will adore. Plus, it’s surprisingly simple! Imagin extracte a vibrant, chewy strip of pure fruit flavor, bursting with natural sweetness. That’s exactly what we’re going to create today. This recipe is wonderfully versatile; you can use almost any fruit you have on hand, from sweet berries to tart apples. Let’s get started on this delightful homemade snack!
Ingredients:
Preparing Your Fruit
The first step in creating perfect fruit leather is selecting and preparing your fruit. I love using a mix of fruits for a more complex flavor profile, but a single fruit can be equally delicious. For instance, a blend of strawberries and raspberries offers a delightful tartness and vibrant color. If you’re using apples, I recommend a sweet variety like Fuji or Gala, and for peaches, make sure they are ripe and fragrant.
Ensure your fruit is washed thoroughly. If you’re using larger fruits like apples or peaches, you’ll need to core and chop them into manageable pieces. For berries, a quick rinse is usually sufficient. If your fruit has peels that are tough or fibrous, like apples, it’s best to peel them before chopping. You don’t need to be perfectly precise with the chopping; the cooking process will break down the fruit into a smooth puree. I often just cut larger fruits into quarters or halves and let the blender do the rest of the work. The goal here is to get the fruit ready for cooking and blending.
Cooking and Blending the Fruit
Now that your fruit is prepped, it’s time to unlock its full flavor potential and create a smooth base for our fruit leather.
1. Simmering the Fruit: Place your chopped fruit in a saucepan over medium heat. Add the lemon juice. The lemon juice is a crucial ingredient here; it not only brightens the fruit’s natural flavor but also helps to balance the sweetness and acts as a natural preservative, giving your fruit leather a longer shelf life. Stir the fruit occasionally as it begin extracts to soften and release its juices. This process usually takes about 10-15 minutes, depending on the type of fruit. You want the fruit to be tender and easily pierced with a fork. For denser fruits like apples, it might take a bit longer. If you notice the mixture becoming too dry, you can add a tablespoon or two of water to prevent sticking.
2. Sweetening and Blending: Once the fruit is tender, it’s time to add the sugar. Stir in the 3 tablespoons of white sugar. Remember, the amount of sugar you need will depend heavily on the natural sweetness of your chosen fruit. Taste a small piece of cooked fruit; if it’s quite tart, you might want to add a little more sugar, but be cautious not to overdo it, as you want the fruit’s flavor to shine through. Continue to cook for another 2-3 minutes, stirring until the sugar is completely dissolved.
Now, carefully transfer the cooked fruit mixture to a blender or food processor. Blend on high speed until you achieve a very smooth puree. You want no discernible chunks of fruit left. This smooth consistency is key to achieving a pliable and pleasant fruit leather. If your blender struggles, you might need to let the mixture cool slightly before blending, or blend in batches. If you don’t have a blender, you can use an immersion blender directly in the pot after cooking.
Dehydrating the Fruit Leather
This is where the magic truly happens, transforming our vibrant puree into chewy strips of fruit leather. There are a couple of methods you can use, depending on your kitchen equipment.
3. Preparing for Dehydration: Preheat your oven to its lowest setting, typically around 170°F (77°C) to 200°F (93°C). Line a baking sheet (or two, depending on how much fruit you’re making) with parchment paper or a silicone baking mat. Ensure the lining extends slightly up the sides of the baking sheet to create a lip, which will help contain the fruit puree. Spread the fruit puree evenly over the prepared baking sheet. Aim for a thickness of about 1/8 to 1/4 inch. You want it thin enough to dry thoroughly but not so thin that it becomes brittle. A good way to ensure an even layer is to use an offset spatula to spread it out.
4. The Drying Process: Place the baking sheet in the preheated oven. The drying time will vary significantly depending on your oven’s temperature, the thickness of your fruit layer, and the humidity in your kitchen. This process can take anywhere from 4 to 12 hours. It’s crucial to keep an eye on it. You’re looking for the fruit leather to be no longer sticky to the touch but still pliable. If you can press your finger into it and it springs back, it’s likely ready. You might need to rotate the baking sheet halfway through the drying process to ensure even drying. Some ovens have “warm” settings that are even lower and might be ideal for this. If you have a dehydrator, you can use that according to the manufacturer’s instructions, which usually results in a more consistent drying time.
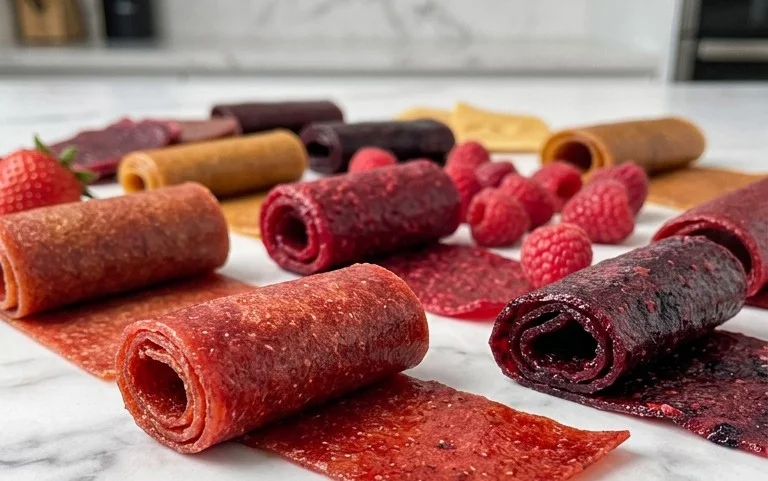
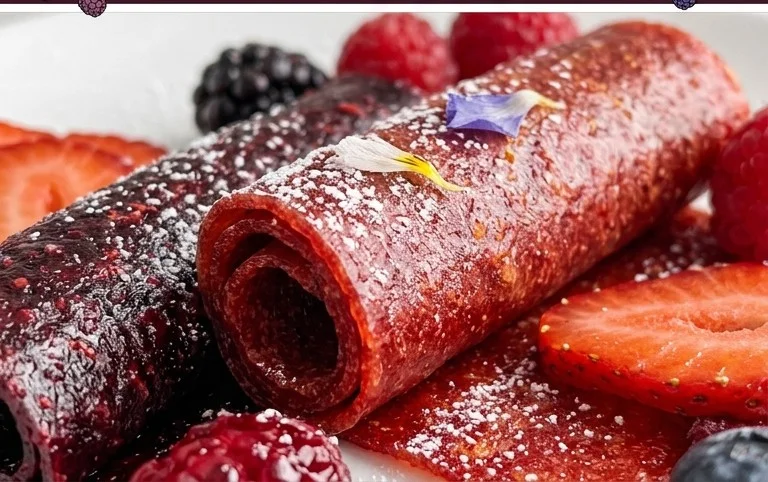
5. Cooling and Cutting: Once the fruit leather appears dry and pliable, carefully remove the baking sheet from the oven. Let it cool completely on the baking sheet. As it cools, it will firm up slightly. Once cool, you can peel the fruit leather away from the parchment paper or silicone mat. To cut your fruit leather into strips, you can use a pizza cutter or a sharp knife. I like to cut mine into about 1-inch wide strips, but you can customize the size to your preference. You can then roll up the individual strips for easy storage and portioning, or simply cut them into squares.
Store your homemade fruit leather in an airtight container at room temperature for up to two weeks, or in the refrigerator for longer storage. Enjoy your delicious, homemade creation!
Conclusion:
Making your own homemade fruit leather is a truly rewarding experience! It’s a fantastic way to preserve the vibrant flavors of seasonal fruits, transform them into a healthy and delicious snack, and avoid the artificial additives often found in store-bought versions. The process is surprisingly simple, requiring just a few ingredients and a bit of patience. You’ll love the flexibility to customize flavors and textures to your exact preferences, making this a recipe you’ll return to again and again.
These chewy, sweet treats are incredibly versatile. Enjoy them as a satisfying snack on their own, pack them into lunchboxes for a fun surprise, or even crum extractble them over yogurt or ice cream for an extra burst of fruity goodness. Don’t be afraid to get creative with your fruit combinations – think strawberry-banana, apple-cinnamon, or even a tropical mango-pineapple blend!
I highly encourage you to give this homemade fruit leather recipe a try. It’s a fun activity for the whole family and the delicious results are well worth the effort. Embrace the sweetness and enjoy crafting your own personalized fruit leathers!
Frequently Asked Questions:
What fruits work best for homemade fruit leather?
Almost any fruit can be used, but fruits with a good balance of sweetness and tartness, like berries, apples, peaches, plums, and mangoes, tend to yield the best results. Overripe fruits are often ideal as they are naturally sweeter and softer.
How long does homemade fruit leather last?
When stored properly in an airtight container at room temperature or in the refrigerator, your homemade fruit leather can last for several weeks. For longer storage, you can also freeze it.
Can I add sweeteners or spices to my fruit leather?
Absolutely! You can add a touch of honey, maple syrup, or agave nectar if your fruit isn’t sweet enough. Spices like cinnamon, nutmeg, or gin extractger can also add delightful warmth and complexity to your fruit leather creations.
Homemade Fruit Leather
A simple and delicious way to preserve fresh fruit into a chewy, sweet treat.
Ingredients
-
2 cups fruit, chopped
-
3 tbsp white sugar
-
1/2 whole lemon, just the juice
-
1/4 teaspoon ground cinnamon
-
1/8 teaspoon ground ginger
Instructions
-
Step 1
Prepare your fruit: Wash, pit, and chop your chosen fruit into small pieces. -
Step 2
Cook the fruit: Combine the chopped fruit in a saucepan with the white sugar and lemon juice. Cook over medium heat, stirring occasionally, until the fruit has softened and released its juices, about 10-15 minutes. -
Step 3
Blend the mixture: Transfer the cooked fruit mixture to a blender or food processor. Add cinnamon and ginger. Blend until very smooth, with no large chunks. -
Step 4
Prepare for baking: Preheat your oven to the lowest possible temperature, usually around 170°F (75°C). Line a baking sheet with parchment paper or a silicone baking mat, ensuring it extends up the sides to contain the liquid. -
Step 5
Spread and bake: Pour the blended fruit mixture onto the prepared baking sheet and spread it into a thin, even layer, about 1/8 to 1/4 inch thick. Place the baking sheet in the preheated oven and bake for 2-4 hours, or until the fruit leather is no longer sticky to the touch and peels easily from the parchment. -
Step 6
Cool and cut: Let the fruit leather cool completely on the baking sheet. Once cooled, peel it off the parchment paper and cut it into desired shapes or strips using a sharp knife or pizza cutter. Store in an airtight container at room temperature.
Important Information
Nutrition Facts (Per Serving)
It is important to consider this information as approximate and not to use it as definitive health advice.
Allergy Information
Please check ingredients for potential allergens and consult a health professional if in doubt.