Easter Poke Cake Delight- Easy & Delicious Recipe
Easter Poke Cake is a festive and delightful dessert that truly embodies the spirit of spring celebrations. Imagin extracte a light, fluffy cake, generously dotted with pockets of vibrant, fruity goodness, all enrobed in a creamy, dreamy frosting. It’s no wonder this Easter Poke Cake has become a beloved staple for so many families. What’s not to adore? It’s incredibly easy to make, making it a perfect activity for kids, and the customizable nature allows for endless flavor combinations. Each bite offers a burst of unexpected moisture and flavor, a delightful surprise that sets it apart from your average cake. Whether you’re aiming for a classic lemon-lime combination or experimenting with pastel-colored jell-o and whipped cream, this Easter Poke Cake is guaranteed to be the star of your dessert table.

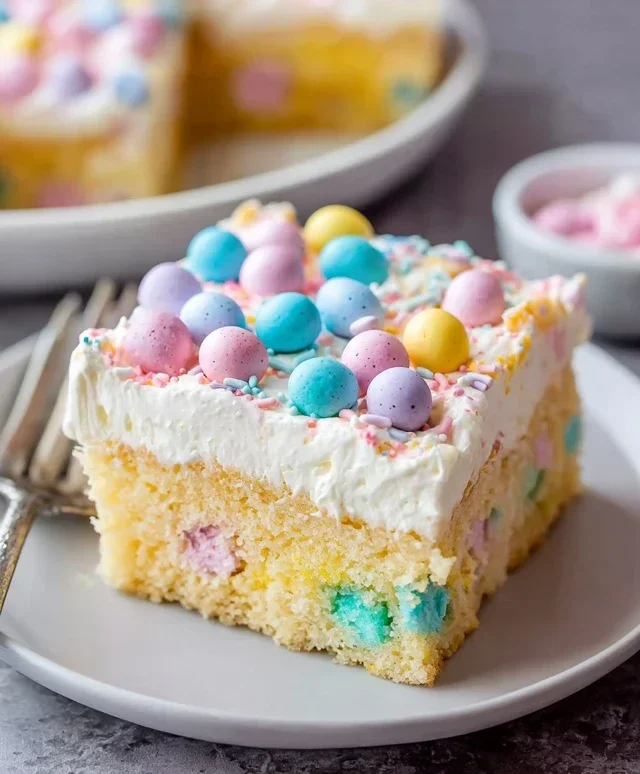
Easter Poke Cake
Get ready to impress your Easter guests with this utterly delightful Easter Poke Cake! This cake is a showstopper, not just because of its vibrant pastel colors, but also because of its incredibly moist and creamy texture. The magic happens when you poke holes into a baked cake and pour a luscious pudding mixture over it, allowing it to soak in and create pockets of pure vanilla goodness. Topped with fluffy whipped cream, sweet coconut, and festive Easter sprinkles, it’s a dessert that screams celebration.
This recipe is surprisingly easy to make, making it perfect for any baker, from begin extractner to pro. The key to its success lies in its simplicity and the wonderful flavor combinations. The white cake provides a perfect canvas for the colorful pudding, and the creamy topping ties it all together. Let’s dive into making this Easter masterpiece!
Ingredients:
Making the Cake Base
The first step to creating our Easter Poke Cake is to bake the cake itself. This is where our classic white cake mix comes into play, but we’re going to elevate it slightly for a more tender crum extractb.
1. Preheat your oven to the temperature specified on your cake mix box, usually around 350°F (175°C). Grease and flour a 9×13 inch baking pan. This ensures our cake won’t stick and will come out beautifully.
2. In a large mixing bowl, combine the 15.25 ounce white cake mix, 3 egg whites, ½ cup vegetable oil, ½ cup Greek yogurt, and ¾ cup whole milk. The Greek yogurt is our secret weapon for an incredibly moist and tender cake; it adds richness and a subtle tang that balances the sweetness.
3. Mix the ingredients using an electric mixer on low speed until just combined. Then, increase the speed to medium and beat for about 2 minutes, or until the batter is smooth and well-aerated. Be careful not to overmix at this stage; overmixing can develop the gluten too much, resulting in a tougher cake.
4. Pour the batter evenly into the prepared baking pan. Bake for the time recommended on the cake mix box, or until a wooden skewer or toothpick inserted into the center comes out clean. For a 9×13 inch pan, this is typically around 30-35 minutes.
5. Once baked, remove the cake from the oven and let it cool in the pan on a wire rack for about 15-20 minutes. While the cake is still warm but not piping hot, it’s time to start creating those all-important holes for our pudding.
Infusing the Cake with Flavor and Color
This is where the fun really begin extracts! We’ll be infusing our cake with a vibrant and delicious vanilla pudding.
1. While the cake is cooling, prepare the pudding. In a medium bowl, whisk together the 5.1 ounces instant vanilla pudding mix and 2 ¾ cups whole milk. Whisk vigorously for about 2 minutes, until the pudding starts to thicken. Let it sit for about 5 minutes to fully set.
2. Now, for the colorful magic! Divide the thickened vanilla pudding into three smaller bowls. Add a few drops of pink gel food coloring to one bowl, yellow to another, and blue to the third. Stir each bowl gently until the color is evenly distributed. You want distinct pastel shades. If you want a more intense color, add another drop of food coloring.
3. Once the cake has cooled slightly but is still warm, it’s time to poke! Using the handle of a wooden spoon or a dowel rod, poke holes all over the surface of the cake. Space the holes about 1-1.5 inches apart. Don’t be shy; the more holes, the more pudding will soak in!
4. Now, grab your colorful puddings. Spoon dollops of each color randomly over the poked cake. Don’t worry about making it perfect; the marbled effect will be beautiful.
5. Gently spread the puddings out with the back of a spoon or a spatula, allowing them to fill the holes. You can swirl the colors slightly if you like, but the beauty of poke cake is its slightly imperfect, rustic charm.
6. Cover the cake loosely with plastic wrap and refrigerate for at least 2-3 hours, or preferably overnight. This chilling time is crucial for the pudding to fully soak into the cake, creating that signature moist and gooey texture.
The Creamy Topping and Finishing Touches
The final flourish to our Easter Poke Cake is a cloud of fluffy whipped cream, a sprinkle of sweet coconut, and a festive Easter adornment.
1. Just before serving, prepare the whipped cream. In a chilled mixing bowl, combine the 2 cups heavy cream and 3 tablespoons granulated sugar.
2. Beat with an electric mixer on medium-high speed until stiff peaks form. Be careful not to overbeat, or you’ll end up with butter! The cream should hold its shape when the beaters are lifted.
3. Carefully spread the whipped cream evenly over the chilled poke cake. You can use an offset spatula for a smooth finish or a piping bag for a more decorative look.
4. Sprinkle the 1 cup of sweetened shredded coconut generously over the whipped cream. This adds a delightful chegrape juicess and a tropical note that complements the vanilla perfectly.
5. Finally, decorate your Easter Poke Cake with your favorite Easter sprinkles and/or mini eggs. This is the perfect time to get creative and make your cake truly festive for the occasion.
Slice and serve this delightful Easter Poke Cake, and watch as your loved ones marvel at its beauty and savor its incredible flavor. Happy Easter baking!
Conclusion:
There you have it – a delightful and incredibly easy Easter Poke Cake recipe that’s sure to be a hit at any spring celebration! The magic of this cake lies in its simplicity and the way the pudding or Jell-O mixture infuses every bite with moisture and vibrant flavor. It’s a truly foolproof dessert that even novice bakers can master, and the results are always impressive. Imagin extracte the smiles when your guests dig into this beautifully decorated, wonderfully moist creation. This Easter Poke Cake is perfect for potlucks, family gatherings, or simply as a special treat to brighten your day.
For serving, I love to top this cake with a fluffy whipped cream or cream cheese frosting, and of course, plenty of festive Easter sprinkles! For variations, feel free to experiment with different cake flavors like lemon or vanilla, and pair them with complementary pudding or Jell-O flavors like lime or strawberry. You could even add a hint of citrus zest to the cake batter for an extra layer of brightness. I wholeheartedly encourage you to give this Easter Poke Cake a try – it’s a joyful and delicious way to celebrate the season!
Frequently Asked Questions:
Q: Can I make this Easter Poke Cake ahead of time?
A: Absolutely! You can bake the cake and poke the holes the day before. Once you’ve added the pudding or Jell-O mixture, cover the cake tightly and refrigerate it. Then, frost and decorate it just before serving for the freshest presentation.
Q: What kind of pudding should I use?
A: Instant pudding works best for this recipe as it sets quickly and is designed to be mixed with cold liquid. You can use any flavor you like! Vanilla, cheesecake, or even a fruity flavor like strawberry or lemon will complement the cake beautifully.
Q: How do I get those perfectly even holes in the cake?
A: The best tool for making the holes is the handle of a wooden spoon or a small spatula. Press down gently and evenly across the entire surface of the cake, spacing them about an inch apart. This ensures the liquid can penetrate all parts of the cake for maximum moistness.
Easter Poke Cake
A festive and colorful poke cake perfect for Easter celebrations, featuring a fluffy cake, creamy pudding filling, and sweet coconut topping.
Ingredients
-
15.25 ounce white cake mix
-
3 egg whites
-
½ cup vegetable oil
-
½ cup greek yogurt
-
¾ cup whole milk
-
Pink, yellow, and blue gel food coloring
-
5.1 ounces instant vanilla pudding mix
-
2 ¾ cups whole milk
-
2 cups heavy cream
-
3 Tablespoons granulated sugar
-
1 cup sweetened shredded coconut
-
Easter sprinkles and/or mini eggs for topping
Instructions
-
Step 1
Preheat oven to 350°F (175°C). Grease and flour a 9×13 inch baking pan. -
Step 2
In a large bowl, combine the white cake mix, egg whites, vegetable oil, greek yogurt, and ¾ cup whole milk. Mix until well combined. -
Step 3
Pour batter into the prepared baking pan. Bake for 30-35 minutes, or until a wooden skewer inserted into the center comes out clean. -
Step 4
While the cake is baking, prepare the pudding. In a medium bowl, whisk together the instant vanilla pudding mix and 2 ¾ cups whole milk until smooth. Let it sit for 5 minutes to thicken. -
Step 5
Once the cake is out of the oven, immediately poke holes all over the top with a fork or the handle of a wooden spoon. -
Step 6
Drizzle the thickened pudding evenly over the warm cake, allowing it to seep into the holes. Divide the pudding into three smaller bowls and tint each with a different gel food coloring (pink, yellow, blue) for a marbled effect. Gently swirl the colors together on top of the cake. -
Step 7
In a separate bowl, whip the heavy cream and granulated sugar until stiff peaks form. Spread the whipped cream over the pudding layer. -
Step 8
Sprinkle the shredded coconut evenly over the whipped cream. Decorate with Easter sprinkles and/or mini eggs. -
Step 9
Chill the cake for at least 2 hours before serving to allow the flavors to meld and the cake to set.
Important Information
Nutrition Facts (Per Serving)
It is important to consider this information as approximate and not to use it as definitive health advice.
Allergy Information
Please check ingredients for potential allergens and consult a health professional if in doubt.