Crispy Chicken Caesar Sandwich-Best Recipe Ever
Crispy Chicken Caesar Sandwich lovers, rejoice! If you’ve ever craved that iconic Caesar salad flavor profile but wanted something more substantial, more satisfying, and frankly, more fun, then this is the recipe for you. We all know and adore the creamy, tangy dressing, the salty bite of Parmesan, and the crisp crunch of romaine. But imagin extracte all of that, elevated, nestled between perfectly toasted bread with a star player: gloriously crispy chicken. This isn’t just any chicken sandwich; it’s a symphony of textures and tastes that will transport you straight to sandwich nirvana. What makes the Crispy Chicken Caesar Sandwich truly special is its ability to be both a comforting classic and an exciting new experience. It’s that perfect blend of familiar flavors in an irresistible new format, promising a bite that’s simultaneously familiar and utterly delightful. Get ready to elevate your lunch game!

Crispy Chicken Caesar Sandwich
There’s something undeniably satisfying about a perfectly crispy chicken sandwich. And when you combine that with the zesty, creamy, and umami-rich flavors of a classic Caesar salad? You’ve got a winner. This Crispy Chicken Caesar Sandwich is my go-to for a lunch that feels both indulgent and incredibly flavorful. The secret lies in getting that chicken perfectly golden and crunchy, and then slathering it with a homemade Caesar dressing that’s far superior to any store-bought version. We’re talking about a symphony of textures and tastes – the crunch of the chicken, the softness of the bun, the crispness of the lettuce, and the irresistible tang of the dressing.
Let’s get started and build this masterpiece!
Ingredients:
Note 1: Preparing the Chicken
For this recipe, I like to use chicken cutlets. If you can’t find pre-cut cutlets, you can easily make your own. Take boneless, skinless chicken breasts and place them between two pieces of plastic wrap or parchment paper. Use the flat side of a meat mallet or a rolling pin to gently pound them to an even thickness of about ½ inch. This ensures they cook evenly and quickly, leading to that perfect crispy exterior without drying out the inside. Pat the cutlets thoroughly dry with paper towels; this is crucial for achieving a really crispy coating.
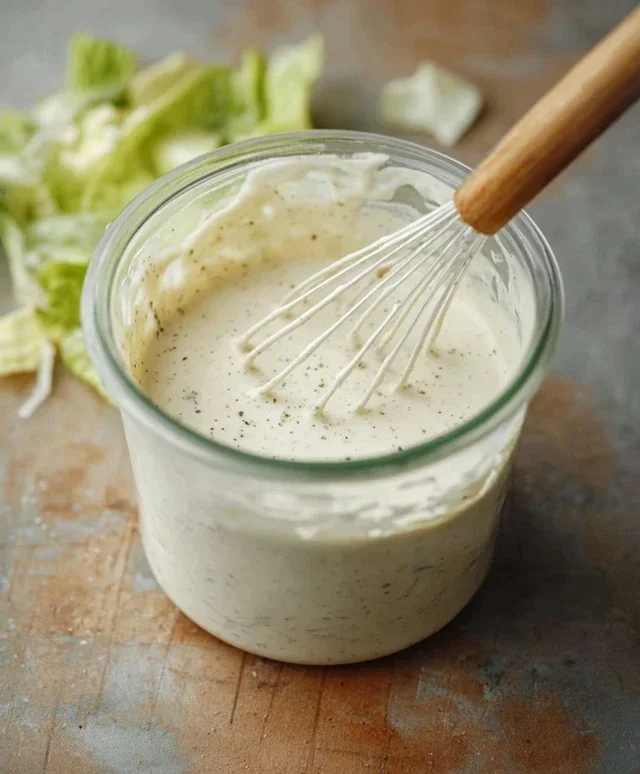
Making the Creamy Caesar Dressing
This is where the magic happens! Forget about bland, bottled dressings. This homemade version is vibrant, packed with flavor, and incredibly easy to whip up.
In a medium bowl, combine the ½ cup of full-fat mayonnaise, 3 tablespoons of Greek yogurt (this adds a lovely tangin extractess and keeps it from being too heavy), 1 teaspoon of Dijon mustard for a little kick, and 1 teaspoon of Worcestershire sauce for that essential umami depth. Now, squeeze in 2 tablespoons of fresh lemon juice – the brightness is key to cutting through the richness. Add your ¼ cup of freshly grated Parmesan cheese. The fresher the better for the best flavor and texture! Mince 1-2 garlic cloves very finely or use a microplane for an even smoother integration into the dressing. Finally, season with ¼ teaspoon of black pepper and a pinch of sea salt. Whisk everything together until it’s beautifully smooth and creamy. Taste and adjust seasoning as needed; you might want a little more lemon juice, salt, or pepper depending on your preference. This dressing is fantastic on salads, but it’s the star of our sandwich!
Coating and Frying the Chicken
Now for the star of the show: the crispy chicken!
1. Set up your dredgin extractg station. In a shallow dish or plate, combine the ⅓ cup of all-purpose flour with ½ teaspoon of salt and a good pinch of ground black pepper. This seasoned flour will be our coating.
2. Season your chicken cutlets generously on both sides with sea salt and ground black pepper. Don’t be shy here; this is your primary seasoning for the chicken itself.
3. Heat your frying oil in a large, heavy-bottomed skillet over medium-high heat. You’ll want enough oil to come about ½ inch up the sides of the pan. A good test to see if the oil is hot enough is to drop a tiny pinch of flour into it. If it sizzles immediately, you’re ready.
4. Carefully dredge each seasoned chicken cutlet in the seasoned flour, ensuring it’s fully coated. Shake off any excess flour.
5. Gently place the floured chicken cutlets into the hot oil. Be careful not to overcrowd the pan; fry in batches if necessary to maintain oil temperature and ensure even crisping. Fry for about 3-5 minutes per side, or until golden brown and cooked through. The internal temperature of the chicken should reach 165°F (74°C).
6. Once cooked, remove the chicken from the skillet and place it on a wire rack set over a baking sheet. This allows excess oil to drain off, keeping the chicken wonderfully crispy.
Assembling Your Masterpiece
Now that we have our perfectly crispy chicken and our glorious Caesar dressing, it’s time to assemble these incredible sandwiches.
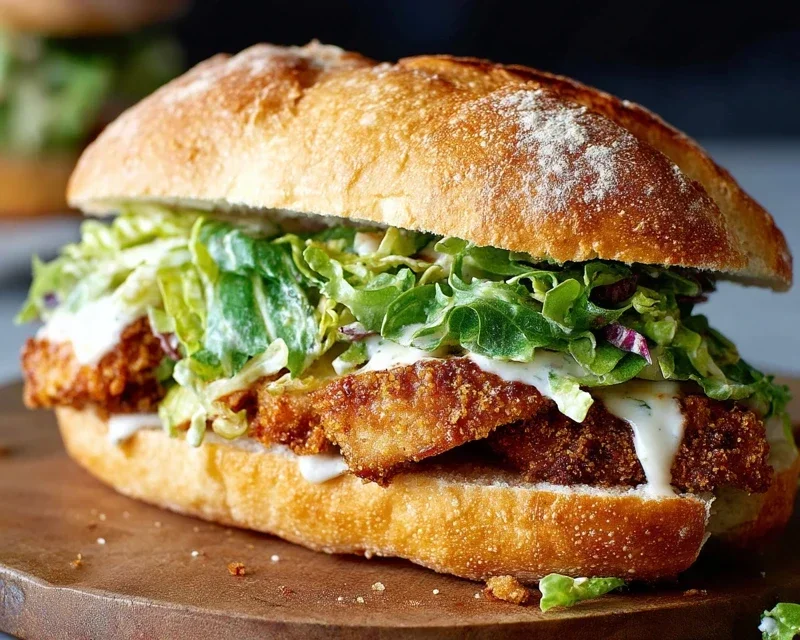
First, choose your favorite sandwich buns. Toasted brioche buns or ciabatta rolls work beautifully. Lightly toast the insides of your buns. Spread a generous amount of your homemade Caesar dressing on the bottom half of each bun. Place a crispy chicken cutlet on top of the dressing. Then, add your fresh toppings. A few crisp romaine lettuce leaves are a must, providing a refreshing crunch that complements the fried chicken. Some people also like to add extra shaved Parmesan cheese or even some thin slices of red onion for a little bite. Finally, spread a little more Caesar dressing on the top half of the bun and place it on top of the chicken.
Serve immediately and enjoy the symphony of flavors and textures! This sandwich is a guaranteed crowd-pleaser and a true testament to how delicious simple ingredients can be when prepared with a little care and attention. Enjoy every crispy, creamy, tangy bite!
Conclusion:
There you have it – the ultimate guide to crafting a truly exceptional Crispy Chicken Caesar Sandwich! We’ve explored how the perfect balance of crunchy, seasoned chicken, creamy Caesar dressing, fresh romaine, and that satisfying bite from toasted bread comes together to create a sandwich that’s far more than the sum of its parts. It’s a delightful symphony of textures and flavors that’s surprisingly easy to achieve, making it a fantastic weeknight dinner option or a show-stopping lunch.
To elevate your experience even further, consider serving this masterpiece alongside a crisp side salad, some golden sweet potato fries, or even a light and refreshing coleslaw. For those craving a twist, don’t hesitate to experiment! Add some crispy beef bacon, a sprinkle of parmesan crisps for extra crunch, or a dash of hot sauce to the dressing for a little kick. You could even swap out the chicken for crispy baked tofu for a vegetarian delight. I truly encourage you to give this Crispy Chicken Caesar Sandwich a try – I’m confident it will become a new favorite in your recipe repertoire!
Frequently Asked Questions:
Can I make the chicken ahead of time?
Absolutely! For ultimate convenience, you can bread and cook the chicken pieces a day in advance. Let them cool completely and store them in an airtight container in the refrigerator. Reheat them briefly in a toaster oven or a skillet until warmed through and still crispy before assembling your sandwich.
What kind of bread works best?
A sturdy, slightly chewy bread is ideal for holding up to the fillings. Think ciabatta, a good quality sourdough, or even a crusty Italian loaf. Toasting it lightly is key to preventing soggin extractess and adding another layer of texture to your sandwich.
My Caesar dressing is too thick. What can I do?
If your homemade Caesar dressing is a bit too thick, simply whisk in a teaspoon of water or lemon juice at a time until you reach your desired consistency. This will help make it perfectly spreadable for your sandwich.
Crispy Chicken Caesar Sandwich
A delicious and satisfying sandwich featuring crispy fried chicken cutlets, a creamy homemade Caesar dressing, and fresh Parmesan cheese, all served on toasted bread.
Ingredients
-
½ cup full-fat mayonnaise
-
3 tbsp Greek yogurt
-
1 tsp Dijon mustard
-
1 tsp Worcestershire sauce
-
2 tbsp lemon juice
-
¼ cup Parmesan cheese (freshly grated)
-
1-2 garlic cloves (minced)
-
¼ tsp black pepper
-
Pinch sea salt
-
5 chicken cutlets
-
sea salt (to taste)
-
ground black pepper (to taste)
-
Oil (for frying)
-
⅓ cup all-purpose flour
-
½ tsp salt
Instructions
-
Step 1
In a medium bowl, whisk together the mayonnaise, Greek yogurt, Dijon mustard, Worcestershire sauce, lemon juice, Parmesan cheese, minced garlic, ¼ tsp black pepper, and pinch of sea salt. This is your Caesar dressing. Set aside. -
Step 2
Place chicken cutlets between two pieces of plastic wrap and pound to an even thickness. Season both sides with sea salt and ground black pepper to taste. -
Step 3
In a shallow dish, combine the all-purpose flour, ½ tsp salt, and additional black pepper if desired. Dredge each chicken cutlet in the flour mixture, ensuring it is fully coated. -
Step 4
Heat about 1 inch of oil in a large skillet over medium-high heat until shimmering. Carefully add the floured chicken cutlets to the hot oil and fry for 4-6 minutes per side, or until golden brown and cooked through. -
Step 5
Remove the cooked chicken from the skillet and place on a wire rack to drain excess oil. Let rest for a few minutes. -
Step 6
Assemble the sandwiches by spreading a generous amount of Caesar dressing on toasted bread, placing a crispy chicken cutlet on top, and adding more dressing as desired.
Important Information
Nutrition Facts (Per Serving)
It is important to consider this information as approximate and not to use it as definitive health advice.
Allergy Information
Please check ingredients for potential allergens and consult a health professional if in doubt.