Easy French Macaron Recipe – Perfect Delicate Cookies
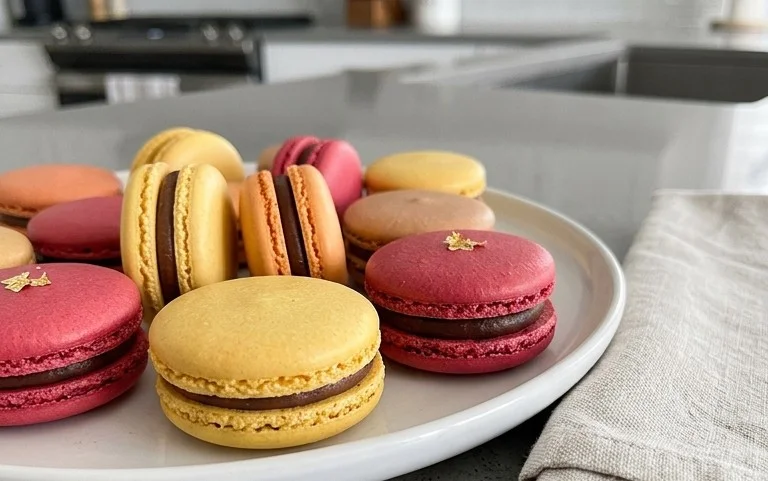
French macarons are more than just a cookie; they are tiny edible jewels, a delicate dance of crisp shells and luscious fillings that captivate the senses. For many of us, the allure of the French macaron lies in their ethereal texture – that signature “foot” that rises elegantly, the slight crispness giving way to a chewy interior. These exquisite treats are a testament to precision and patience in the kitchen, a labor of love that yields a truly rewarding result. Why do we adore them so? Perhaps it’s their inherent elegance, their vibrant colors, or the endless flavor possibilities they offer. Crafting perfect French macarons at home might seem daunting, but with a little guidance and a lot of heart, you too can master the art of these delightful confections. Get ready to impress yourself and your loved ones with your very own batch of authentic French macarons!
French Macaron Recipe
Ah, the French macaron. Those delicate, colorful, jewel-like cookies that seem to melt in your mouth. They’re often considered the pinnacle of home baking, a challenge that many bakers dream of conquering. But I’m here to tell you, with a little patience, precision, and the right guidance, you absolutely can achieve macaron perfection in your own kitchen. Forget the store-bought imposters; the homemade version is an entirely different experience. Let’s get started on creating these little bites of heaven!
Ingredients:
Macaron Shell Preparation:
This is where the magic begin extracts. The key to successful macarons lies in meticulous preparation and understanding the science behind the meringue. Don’t rush this stage; accuracy is your best friend.
1. Sifting the Dry Ingredients: This is a crucial first step that cannot be skipped. Take your sifted super-fine almond flour and powdered sugar and combine them in a medium bowl. Now, you’ll need to sift them together at least two to three times. Yes, it sounds like a lot, but this process removes any lumps and ensures an incredibly fine, smooth texture for your shells. The finer your dry ingredients, the smoother your macaron shells will be, preventing those dreaded bumps and cracks. After sifting, gently stir in the 1/4 teaspoon of salt. Set this dry mixture aside.
2. Preparing the Meringue: In a very clean, grease-free bowl of your stand mixer (or using a hand mixer), add the 120 grams of room-temperature egg whites. Ensure there is absolutely no trace of yolk or grease, as this will prevent your meringue from whipping properly. Begin extract whipping the egg whites on a medium speed until they become foamy. Gradually add the 60 grams of granulated sugar, a tablespoon at a time, while the mixer is still running. Continue to whip the egg whites on medium-high speed until stiff, glossy peaks form. This means when you lift the whisk attachment, the meringue stands straight up without drooping. This is your Italian meringue base, and its stability is paramount.
3. Adding Flavor and Color: Once your stiff peaks are achieved, it’s time to introduce color and flavor. Add the 4 drops of liquid-gel food coloring and the 1 teaspoon of pure vanilla extract to the meringue. Continue to whip for another minute or two until the color is evenly distributed and the meringue is glossy and vibrant. The gel food coloring is preferred as it contains less liquid than liquid food coloring, which can affect the macaron batter consistency.
4. Macaronage – The Art of Folding: This is arguably the most critical and often misunderstood step. Gently add about a third of your sifted dry ingredients to the meringue. Using a rubber spatula, begin extract to fold the dry ingredients into the meringue. Use a motion that scrapes down the sides of the bowl and then brings the batter up from the bottom, cutting through the center. Don’t overmix at this stage. Once partially incorporated, add the remaining dry ingredients in two more additions, continuing the folding process. You’re looking for a consistency that’s often described as “lava-like” or “ribbon-like.” When you lift the spatula, the batter should fall off in a thick, continuous ribbon, and it should slowly settle back into the bowl, creating a figure-eight pattern before disappearing. If you overmix, your macarons will spread too much and become flat. If you undermix, they might be lumpy or have no feet. It takes practice to master this, so be patient with yourself!
5. Piping and Resting: Prepare two baking sheets by lining them with parchment paper or silicone baking mats. Fit a piping bag with a round tip (about 1/2 inch). Fill the piping bag with your macaron batter. Hold the piping bag vertically, about 1/2 inch above the baking sheet, and pipe small, uniform rounds of batter, about 1 to 1.5 inches in diameter. Leave a little space between each macaron as they will spread slightly. Once you’ve piped all your macarons, firmly tap the baking sheets on your countertop several times. This action releases any trapped air bubbles that could cause your macarons to crack during baking. Now comes the resting period: let the piped macarons sit at room temperature for 30-60 minutes, or until a dry skin forms on the surface. You should be able to gently touch a macaron without any batter sticking to your finger. This skin is essential for developing those characteristic “feet” during baking.
Baking the Macarons:
Once your macarons have developed their skin, they’re ready for the oven. Temperature and time are key here.
1. Preheating and Baking: Preheat your oven to 300°F (150°C). Place one baking sheet at a time on the middle rack of your preheated oven. Bake for 12-15 minutes. You’ll know they are ready when the tops are firm to the touch and the “feet” have developed nicely. You can gently try to wiggle a macaron; if it moves freely on its base, it’s likely done.
2. Cooling: Once baked, remove the macarons from the oven and let them cool on the baking sheet for about 5 minutes before carefully transferring them to a wire rack to cool completely. They should lift off the parchment paper or silicone mat easily once fully cooled. If they stick, they may need a few more minutes in the oven or are not quite ready.
Assembly:
1. Matching and Filling: Once your macaron shells are completely cooled, it’s time for the best part – filling them! Gently pair up your macaron shells by size. Take one shell and pipe a generous amount of your chosen filling (like the Vanilla Buttercream Frosting) onto the flat side. Then, gently sandwich it with a matching shell, twisting slightly to spread the filling evenly to the edges.
2. Maturing: For the best flavor and texture, it’s highly recommended to “mature” your macarons. Place the filled macarons in an airtight container in the refrigerator for at least 24 hours. This allows the flavors to meld and the shells to absorb some moisture from the filling, creating that signature chewy center.
Enjoy your homemade French macarons! They are a labor of love, but the reward of biting into these perfectly crafted treats is truly incomparable.
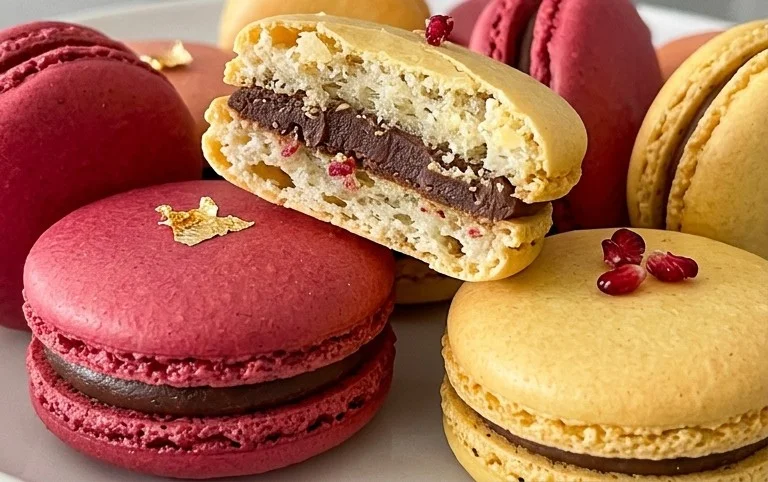
Conclusion:
Mastering the French macaron might seem daunting, but with patience and this detailed recipe, you’re well on your way to creating these delicate, flavorful cookies. The magic of the French macaron lies in its ethereal texture – a crisp shell giving way to a chewy interior – and its endless possibilities for flavor and color. This recipe has laid the groundwork for you to achieve that perfect meringue and smooth filling, ensuring impressive results for any occasion.
These beautiful treats are perfect for afternoon tea, sophisticated desserts, or as a thoughtful handmade gift. Don’t hesitate to experiment with fillings! Classic ganaches, buttercream variations infused with liqueur extracts or citrus zest, or even fruit curds can elevate your macarons. Consider adding a hint of espresso to your shells or a swirl of raspberry jam for a delightful contrast. I wholeheartedly encourage you to give this French macaron recipe a try; the satisfaction of biting into your own perfectly crafted macaron is truly unparalleled.
Frequently Asked Questions:
Why are my macarons cracking on top?
Cracking often occurs due to oven temperature being too high, not letting the macaron shells rest long enough before baking, or over-whipping the meringue. Ensure your oven is accurately calibrated, and allow the shells to form a skin (they should feel dry to the touch) before baking.
What is the best way to store French macarons?
For the best texture, store your French macarons in an airtight container in the refrigerator. They are often even better after a day or two, allowing the flavors of the filling to meld with the shells. You can also freeze them for longer storage; simply place them in a freezer-safe container with parchment paper between layers.
My macarons have no “feet.” What did I do wrong?
The elusive “feet” are the ruffled edges at the base of the macaron. Lack of feet can be caused by insufficient meringue stability, not tapping the baking sheets enough to release air bubbles, or an oven that’s too cool. Ensure your meringue is stiff and glossy, and tap those sheets firmly!
French Macaron Recipe
A classic recipe for making delicate and colorful French macarons with a smooth buttercream filling.
Ingredients
-
150 grams sifted super-fine almond flour
-
180 grams powdered sugar
-
1/4 teaspoon salt
-
120 grams large egg whites
-
60 grams granulated sugar
-
4 drops liquid-gel food coloring
-
1 teaspoon pure vanilla extract
-
Vanilla Buttercream Frosting
Instructions
-
Step 1
In a food processor, pulse together the almond flour and powdered sugar until finely combined. Sift this mixture into a large bowl, discarding any large pieces. Stir in the salt. -
Step 2
In a separate clean bowl, whisk the egg whites until foamy. Gradually add the granulated sugar, whisking until stiff, glossy peaks form. Add the food coloring and vanilla extract, and whisk briefly to combine. -
Step 3
Gently fold about one-third of the almond flour mixture into the meringue. Continue to fold in the remaining almond flour mixture until the batter reaches a lava-like consistency, falling off the spatula in a ribbon. -
Step 4
Transfer the batter to a piping bag fitted with a round tip. Pipe small rounds onto baking sheets lined with parchment paper or silicone mats, leaving about an inch between each macaron. -
Step 5
Tap the baking sheets firmly on the counter to release any air bubbles. Let the macarons sit at room temperature for at least 30 minutes, or until a skin forms on top. -
Step 6
Preheat oven to 300°F (150°C). Bake the macarons for 12-15 minutes, or until the feet have formed and the tops are firm to the touch. Allow to cool completely on the baking sheets before removing. -
Step 7
Pair the cooled macaron shells and fill with Vanilla Buttercream Frosting or your choice of filling. Store in an airtight container.
Important Information
Nutrition Facts (Per Serving)
It is important to consider this information as approximate and not to use it as definitive health advice.
Allergy Information
Please check ingredients for potential allergens and consult a health professional if in doubt.