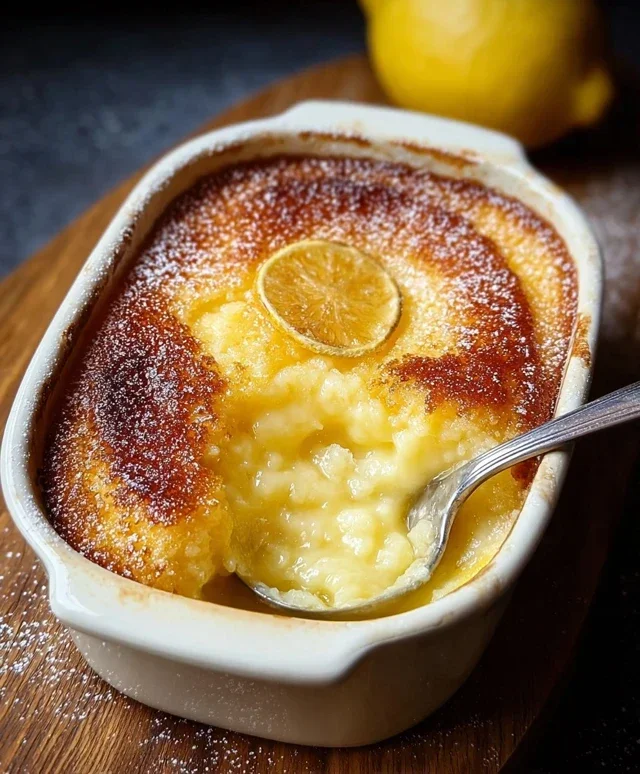
Easy Apple Pie Bars Recipe Deliciously Simple
Apple pie bars are an absolute triumph of comfort food, offering all the beloved flavors of classic apple pie in a perfectly portable and shareable format. Forget the fuss of crimping a pie crust; these apple pie bars deliver that delightful buttery crum extractble and warm, spiced apple filling without the stress. We all adore apple pie for its nostalgic embrace, its ability to conjure memories of cozy evenings and family gatherings. But what makes apple pie bars truly special is their ingenious design. They’re ideal for picnics, potlucks, or just a simple weeknight treat, ensuring that everyone can get their hands on a generous slice of happiness. Get ready to fall in love with this simplified, yet utterly delicious, take on a timeless favorite.
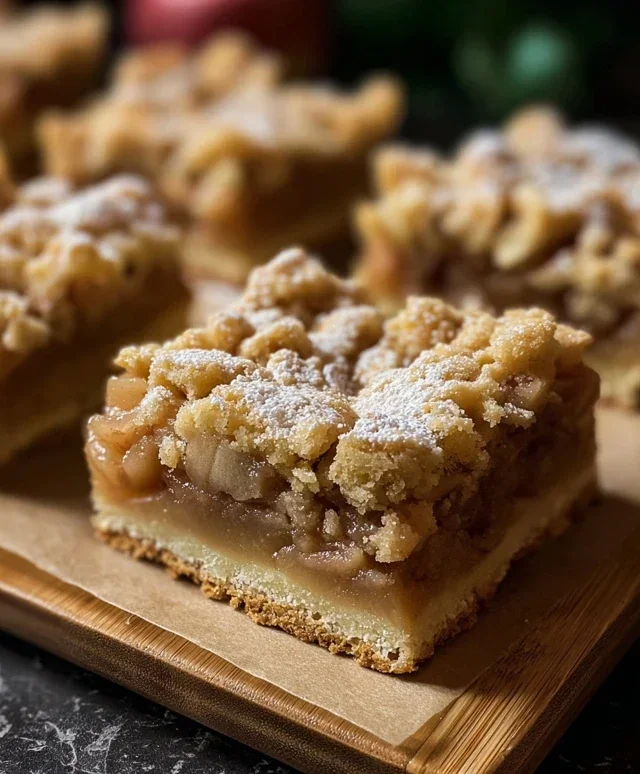
Apple Pie Bars
There’s something undeniably comforting about apple pie. The warm, spiced apples nestled in a flaky crust is a classic for a reason. But sometimes, the thought of rolling out pie dough can feel a bit daunting, or perhaps you’re looking for a more portable and shareable dessert. That’s where apple pie bars come in! They capture all the delicious flavors of a traditional apple pie but in an easy-to-serve, bar form. Perfect for potlucks, bake snon-alcoholic ales, or simply enjoying with a cup of tea, these bars are a guaranteed crowd-pleaser. This recipe simplifies the process without sacrificing any of that beloved apple pie goodness.
Ingredients:
Making the Crust and Filling
The magic of these apple pie bars lies in their simple yet effective construction. We’ll start by creating a buttery, crum extractbly crust that doubles as both the base and a delightful topping. Then, we’ll prepare a luscious apple filling that’s bursting with autumnal flavors.
First, let’s prepare our delicious crust. In a large mixing bowl, whisk together the 2½ cups of all-purpose flour, 1 cup of granulated sugar, 1 teaspoon of baking powder, and ½ teaspoon of salt. This dry mixture will form the foundation of our crust and topping. Next, add the 1 cup (2 sticks) of cold, unsalted butter, which has been cut into small cubes. Using a pastry blender, a fork, or your fingertips, work the butter into the dry ingredients until the mixture resembles coarse crum extractbs. You want to see some pea-sized pieces of butter remaining, as these will create those wonderfully tender and flaky layers in our baked bars. Then, in a small separate bowl, whisk together 1 egg and 1 teaspoon of vanilla extract. Pour this wet mixture into the dry ingredients and stir until just combined. The dough will be crum extractbly and a little sticky; this is exactly what we’re looking for. Don’t overmix it at this stage.
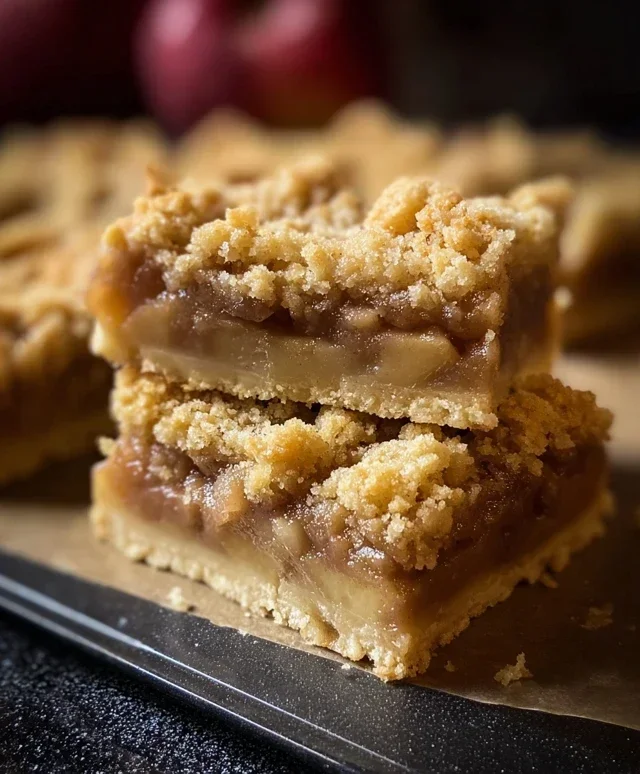
Now, take about two-thirds of this crum extractbly dough and press it evenly into the bottom of a 9×13 inch baking pan. I like to press it firmly with the bottom of a glass or a flat measuring cup to ensure a solid, even base for our filling. This will form the bottom crust of our bars. Once the base is pressed in, set the pan aside. For the filling, in a medium bowl, combine the 4 cups of peeled and diced apples. I prefer using a mix of apples like Granny Smith for tartness and Honeycrisp or Fuji for sweetness, but any good baking apple will work beautifully. Toss the diced apples with 2 tablespoons of lemon juice. The lemon juice not only adds a bright, fresh flavor but also helps prevent the apples from browning.
In a separate small bowl, whisk together the ½ cup of brown sugar, 2 teaspoons of cinnamon, and 1 teaspoon of cornstarch. The brown sugar will lend a lovely caramel-like sweetness, and the cinnamon is essential for that classic apple pie aroma and taste. The cornstarch acts as a thickener, ensuring our apple filling doesn’t become too watery once it bakes, giving us those beautiful, distinct bar layers. Sprinkle this sugar-cinnamon-cornstarch mixture over the apples and toss gently until all the apple pieces are evenly coated. This is where all those wonderful apple pie spices really start to come alive.
Next, spoon the prepared apple filling evenly over the pressed crust in the baking pan. Spread it out so you have a nice, consistent layer of apples. Once the apples are in place, take the remaining one-third of the crum extractbly dough that you set aside earlier. Crum extractble this dough evenly over the top of the apple layer. This will create a delightful streusel-like topping that will bake up into a golden, slightly crisp texture. You can also press this remaining dough between your fingers to create larger clumps for a more rustic topping if you prefer. Ensure the topping is distributed as evenly as possible over the entire surface of the apples.
Finally, it’s time to bake these beauties! Preheat your oven to 375 degrees Fahrenheit (190 degrees Celsius). Place the prepared baking pan in the preheated oven and bake for 35-45 minutes, or until the topping is golden brown and the apple filling is bubbly around the edges. You’ll notice the wonderful aroma of cinnamon and baked apples filling your kitchen – a sure sign of deliciousness to come! Once baked, carefully remove the pan from the oven and let the bars cool completely on a wire rack. This cooling step is crucial. If you try to cut them while they are still warm, they will likely fall apart. Patience is key here to achieve clean, beautiful bars. Once fully cooled, you can cut them into your desired bar size. I usually aim for about 12-16 bars, depending on how generous I’m feeling!
These apple pie bars are wonderfully versatile. Serve them warm with a scoop of vanilla ice cream for a truly decadent dessert, or enjoy them at room temperature. They also keep well in an airtight container at room temperature for a couple of days, or in the refrigerator for up to a week. Enjoy this delightful twist on a beloved classic!
Conclusion:
I hope you’re as excited to bake these incredible apple pie bars as I am to eat them! This recipe truly captures all the comforting flavors and textures of classic apple pie, but with the delightful convenience of a bar. The buttery, crum extractbly crust paired with the sweet, spiced apple filling is a match made in dessert heaven. They are perfect for potlucks, holidays, or simply satisfying a craving for something homemade and delicious.
Serving these apple pie bars is a breeze. They are wonderful on their own, or you can elevate them with a dollop of whipped cream, a scoop of vanilla bean ice cream, or a drizzle of caramel sauce. For variations, feel free to experiment with different apple varieties – Granny Smith for tartness, Honeycrisp for sweetness, or a mix of both! Adding a pinch of nutmeg or a tablespoon of brandy extract to the apple filling can also introduce a delightful new dimension. I wholeheartedly encourage you to give these apple pie bars a try; they are sure to become a new favorite in your baking repertoire!
Frequently Asked Questions about Apple Pie Bars:
Can I make these ahead of time?
Yes, absolutely! You can bake the apple pie bars one day in advance and store them in an airtight container at room temperature. If you need to store them for longer, refrigerating them will keep them fresh for up to 3 days. They are delicious served at room temperature or gently warmed.
What kind of apples are best for this recipe?
A mix of sweet and tart apples often yields the best flavor. My favorites for these bars are Granny Smith for their tartness that balances the sweetness, and Honeycrisp or Fuji for a lovely sweetness and good texture that holds up well when baked. Avoid very soft apples like Red Delicious, as they can become mushy.
How can I ensure the crust is crispy?
To guarantee a crispy crust, make sure your butter is cold when you prepare the dough. Don’t overmix the dough; a slightly shaggy dough is ideal. Baking the bars until the edges are golden brown and the filling is bubbling will also contribute to a satisfyingly crisp bottom crust.
Apple Pie Bars
A delicious and easy-to-make twist on classic apple pie, baked into convenient bar form.
Ingredients
-
2½ cups all-purpose flour
-
1 cup granulated sugar
-
1 tsp baking powder
-
½ tsp salt
-
1 cup (2 sticks) cold unsalted butter, cubed
-
1 egg
-
1 tsp vanilla extract
-
4 cups peeled & diced apples
-
2 tbsp lemon juice
-
½ cup brown sugar
-
2 tsp cinnamon
-
1 tsp cornstarch
Instructions
-
Step 1
Preheat oven to 375°F (190°C). Grease and flour a 9×13 inch baking pan. -
Step 2
In a large bowl, whisk together flour, granulated sugar, baking powder, and salt. -
Step 3
Cut in the cold butter using a pastry blender or your fingertips until the mixture resembles coarse crumbs. -
Step 4
In a separate small bowl, whisk together the egg and vanilla extract. Add this to the flour mixture and mix until just combined. Press about two-thirds of the dough evenly into the bottom of the prepared baking pan. -
Step 5
In a medium bowl, toss the diced apples with lemon juice. In a small bowl, combine brown sugar, cinnamon, and cornstarch. Sprinkle this mixture over the apples and toss to coat. -
Step 6
Spread the apple mixture evenly over the dough in the pan. -
Step 7
Crumble the remaining one-third of the dough over the apple layer. -
Step 8
Bake for 35-40 minutes, or until the topping is golden brown and the apples are tender. -
Step 9
Let cool completely in the pan before cutting into bars.
Important Information
Nutrition Facts (Per Serving)
It is important to consider this information as approximate and not to use it as definitive health advice.
Allergy Information
Please check ingredients for potential allergens and consult a health professional if in doubt.