M-M Rice Krispies Cookies-Fun Sweet Treats
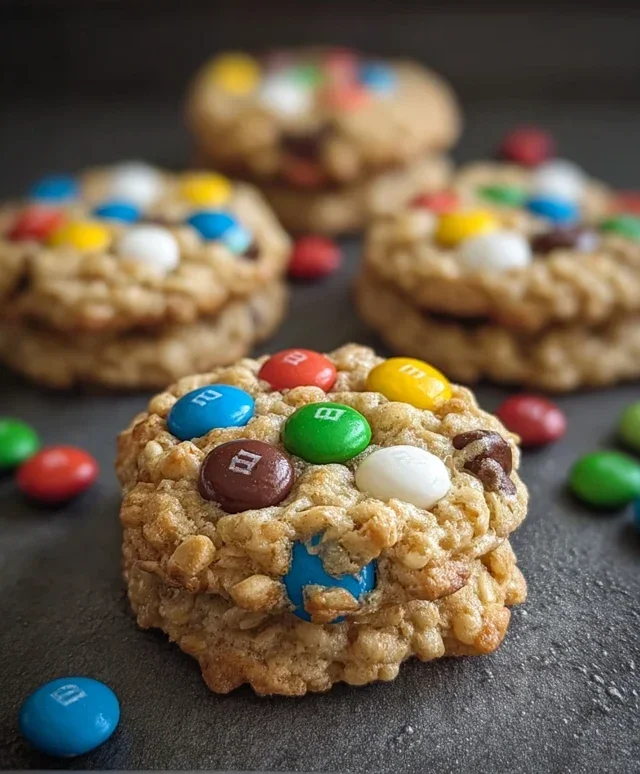
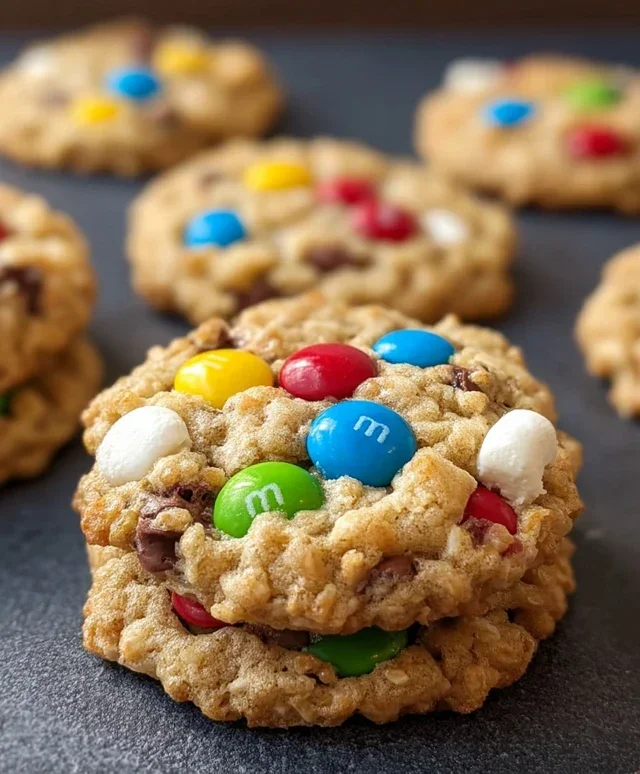
M&M Rice Krispies Cookies are an absolute game-changer, and I’m so excited to share this recipe with you! If you’re anything like me, you probably have a deep-seated love for both classic Rice Krispies treats and the cheerful burst of color and flavor that M&Ms bring. Well, prepare yourself, because we’re combining those two titans of deliciousness into one incredibly easy and utterly satisfying cookie. These aren’t just any cookies; they’re a nostalgic hug in every bite, a delightful explosion of chewy, crispy, and chocolatey goodness that’s guaranteed to bring a smile to everyone’s face. They’re perfect for potlucks, bake snon-alcoholic ales, or just an afternoon treat that’ll make your taste buds sing. What makes our M&M Rice Krispies Cookies truly special is their unique texture – that delightful chegrape juicess from the marshmallows intertgrape juiced with the satisfying crunch of the cereal, all punctuated by those iconic candy-coated chocolate bites.
Get ready for a new favorite!
Let’s dive into this irresistible creation!
M&M Rice Krispies Cookies
Get ready for a cookie that’s a textural wonderland! These M&M Rice Krispies Cookies are an absolute dream for anyone who loves a little crunch with their chewy, chocolatey goodness. Imagin extracte the classic gooeyness of a perfect chocolate chip cookie, but with the added delightful pop and crisp of Rice Krispies and the fun burst of M&M’s. They’re surprisingly easy to make and are guaranteed to be a hit at any gathering, or just for a delightful afternoon treat. The combination of familiar flavors with an unexpected crunch makes these cookies utterly irresistible. We’re talking about a cookie that’s both nostalgic and excitingly new all at once. The slight chew from the brown sugar, the tender crum extractb from the flour, the sweet pops of M&M’s, and that signature Rice Krispies snap – it’s a symphony of deliciousness in every bite. Let’s dive into creating these fantastic treats!
Ingredients:
Instructions:
1. Browning the Butter and Creating the Flavor Base
The first step to unlocking the incredible flavor of these cookies is to brown the butter. This might sound fancy, but it’s quite simple and adds a wonderfully nutty, toasted depth that regular melted butter just can’t replicate. In a medium saucepan, melt the 1/2 cup of unsalted butter over medium heat. Keep an eye on it – you’ll see it start to foam, then the milk solids at the bottom will begin extract to turn golden brown. Swirl the pan occasionally. You’re looking for a beautiful amber color and a rich, nutty aroma. This process usually takes about 5-8 minutes. Once it reaches that perfect stage, immediately remove the pan from the heat and pour the browned butter into a heatproof bowl to stop the cooking. Let it cool slightly for about 5 minutes. Now, in a large mixing bowl, combine the slightly cooled browned butter with the 1/2 cup plus 2 tablespoons of packed brown sugar and the 2 tablespoons of granulated sugar. Use a whisk or an electric mixer on medium speed to cream these together until the mixture is light and fluffy. This step is crucial for incorporating air, which helps create a tender cookie.
2. Incorporating Wet Ingredients and Building the Dough Structure
Once your butter and sugar mixture is light and fluffy, it’s time to add the wet ingredients. Make sure your egg is at room temperature; this helps it emulsify better with the fat, leading to a smoother dough. Crack the large egg into the bowl and whisk it in until fully incorporated. Then, stir in the 1 teaspoon of vanilla extract. The vanilla adds a warm, sweet note that complements all the other flavors beautifully. In a separate medium bowl, whisk together the 1 1/3 cups of all-purpose flour, 1/2 teaspoon of baking soda, and 1/4 teaspoon of salt. Whisking these dry ingredients together ensures that the leavening agent (baking soda) and salt are evenly distributed throughout the flour, which will lead to consistent baking and rise in your cookies. Gradually add the dry ingredients to the wet ingredients, mixing on low speed or by hand with a spatula until just combined. Be careful not to overmix at this stage; overmixing can develop the gluten in the flour too much, resulting in tough cookies. We want a tender crum extractb, so mix only until you no longer see streaks of flour.
3. Adding the Star Mix-ins and the Marshmallow Surprise
Now for the fun part – adding all the goodies that make these cookies so special! Gently fold in the 2/3 cup of mini M&M’s and the 1/3 cup of semisweet chocolate chips. Reserve a few M&M’s and chocolate chips for pressing onto the tops of the cookies later, if you like that extra decorative touch. Then, it’s time to introduce the Rice Krispies cereal. Stir in the 1/4 cup of Rice Krispies cereal. This is where the magic starts to happen in terms of texture. The cereal will add that delightful crispiness. Finally, for the ultimate gooey surprise inside, gently fold in the 6 marshmallows. You can either leave them whole or roughly chop them if you prefer a more dispersed marshmallowy center. The marshmallows will melt and ooze during baking, creating pockets of pure gooey bliss within your cookies. Don’t worry if the dough seems a little uneven with the marshmallows; they will soften and spread as they bake.
4. Shaping, Garnishing, and Baking the Cookies
Preheat your oven to 350 degrees Fahrenheit (175 degrees Celsius). Line baking sheets with parchment paper or silicone baking mats. This prevents sticking and makes cleanup a breeze. Drop rounded tablespoons of cookie dough onto the prepared baking sheets, leaving about 2 inches of space between each cookie to allow for spreading. If you reserved some M&M’s and chocolate chips, now is the time to gently press a few onto the tops of each cookie dough ball. This not only looks beautiful but also ensures you get those delightful pops of flavor and color on the surface. For the extra Rice Krispies topping, lightly sprinkle the reserved 1/3 cup of Rice Krispies cereal over the tops of the cookies. This will add an extra layer of crunch.
5. Baking to Perfection and Cooling
Bake for 10-12 minutes, or until the edges are golden brown and the centers look slightly underbaked. The marshmallows will have melted and might be peeking out a bit, which is exactly what we want! It’s important not to overbake these cookies, as they will continue to set up as they cool. Overbaked cookies will be dry and hard. Once they are out of the oven, let the cookies cool on the baking sheet for about 5-10 minutes. This allows them to firm up sufficiently before you attempt to move them. After they’ve had a chance to rest on the baking sheet, carefully transfer them to a wire rack to cool completely. Enjoy the delightful aroma as they cool! These M&M Rice Krispies Cookies are best enjoyed slightly warm or at room temperature. Store any leftovers in an airtight container at room temperature for up to 3-4 days.
Conclusion:
There you have it! These M&M Rice Krispies Cookies are an absolute triumph, blending the nostalgic crunch of Rice Krispies treats with the delightful chegrape juicess of a classic cookie, all studded with vibrant M&Ms. They’re wonderfully simple to whip up, making them a perfect activity for a rainy afternoon or a last-minute dessert solution. The sweet, buttery base combined with the satisfying snap of the cereal and the bursts of chocolate from the M&Ms creates a truly irresistible treat that’s sure to become a family favorite. Don’t be afraid to get creative!
For serving, these cookies are divine on their own, but they also pair beautifully with a cold glass of milk or even a scoop of vanilla ice cream. Imagin extracte the gooey melted ice cream mingling with the cookie! If you’re feeling adventurous, consider adding a drizzle of white chocolate or a sprinkle of sea salt on top after baking for an extra touch of elegance and flavor contrast. I truly encourage you to give these M&M Rice Krispies Cookies a try; you won’t regret this delightful twist on a classic.
Frequently Asked Questions:
Can I use different types of M&Ms?
Absolutely! While classic M&Ms are wonderful, feel free to experiment with peanut M&Ms, pretzel M&Ms, or even seasonal varieties. Just be mindful that larger additions might slightly alter the cookie’s texture, but the flavor will still be fantastic!
How should I store these cookies?
These M&M Rice Krispies Cookies are best stored in an airtight container at room temperature for up to 3-4 days. They tend to stay delightfully chewy during this time. If they seem a bit dry after a couple of days, you can even pop one in the microwave for 5-10 seconds for a delightfully warm, gooey experience.
What can I do if my cookies spread too much?
If your cookies tend to spread excessively, it could be due to a few factors. Ensure your butter is softened but not melted when creaming with the sugar. Also, chilling the cookie dough for at least 30 minutes before baking can help firm up the ingredients and prevent excessive spreading. You can also try slightly reducing the amount of butter or sugar in the recipe if spreading is a consistent issue for you.
M&M Rice Krispies Cookies
Chewy and crispy cookies loaded with M&M’s, chocolate chips, and a hint of Rice Krispies crunch, all finished with browned butter goodness.
Ingredients
-
1/2 cup unsalted butter, for browning
-
1/2 cup + 2 tablespoons packed brown sugar
-
2 tablespoons granulated sugar
-
1 large egg, room temperature
-
1 teaspoon vanilla extract
-
1 1/3 cups all-purpose flour, spoon and leveled
-
1/2 teaspoon baking soda
-
1/4 teaspoon salt
-
2/3 cup mini M&M’s, plus more for garnish
-
1/3 cup semisweet chocolate chips, plus more for garnish if desired
-
1/4 cup Rice Krispies cereal
-
6 marshmallows
-
1/3 cup Rice Krispies cereal, set aside for topping
Instructions
-
Step 1
Melt the 1/2 cup unsalted butter in a light-colored saucepan over medium heat. Cook, stirring occasionally, until the butter is golden brown and smells nutty. Remove from heat and let cool slightly. -
Step 2
In a large bowl, cream together the browned butter, 1/2 cup + 2 tablespoons packed brown sugar, and 2 tablespoons granulated sugar until light and fluffy. -
Step 3
Beat in the room temperature large egg and 1 teaspoon vanilla extract until well combined. -
Step 4
In a separate medium bowl, whisk together 1 1/3 cups all-purpose flour, 1/2 teaspoon baking soda, and 1/4 teaspoon salt. Gradually add the dry ingredients to the wet ingredients, mixing until just combined. -
Step 5
Gently fold in 2/3 cup mini M&M’s, 1/3 cup semisweet chocolate chips, 1/4 cup Rice Krispies cereal, and 6 marshmallows. -
Step 6
Drop rounded tablespoons of dough onto a baking sheet lined with parchment paper. Sprinkle the tops with the reserved 1/3 cup Rice Krispies cereal and any additional M&M’s or chocolate chips. -
Step 7
Bake at 350°F (175°C) for 10-12 minutes, or until the edges are golden brown and the centers are still slightly soft. -
Step 8
Let the cookies cool on the baking sheet for a few minutes before transferring them to a wire rack to cool completely.
Important Information
Nutrition Facts (Per Serving)
It is important to consider this information as approximate and not to use it as definitive health advice.
Allergy Information
Please check ingredients for potential allergens and consult a health professional if in doubt.