Crispy Hash Browns-Perfectly Golden Breakfast Side
Crispy hash browns are more than just a breakfast side; they’re a culinary hug, a golden beacon of comfort that can elevate any morning meal. Who doesn’t crave that irresistible crunch, the fluffy interior, and the savory potato flavor that defines perfect hash browns? It’s that delightful texture contrast – the shatteringly crisp exterior giving way to tender, steamy potato – that makes them so universally beloved. We’re talking about a dish that’s both humble and magnificent, a classic that never fails to satisfy. Whether you’re topping them with a fried egg, piling them high with cheese, or enjoying them solo, these crispy hash browns are guaranteed to bring a smile to your face. Get ready to discover the secrets to achieving that ultimate crispiness right in your own kitchen!
Crispy Hash Browns
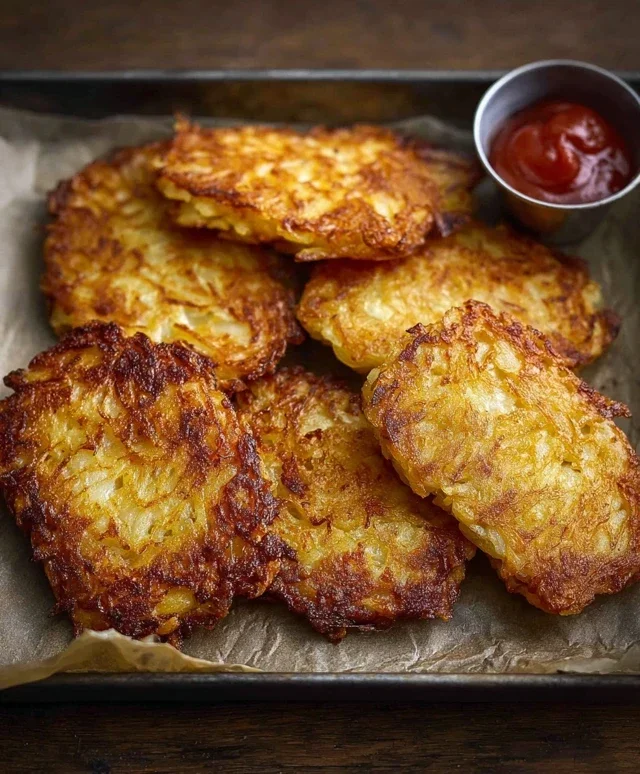
There’s something undeniably comforting and delicious about a plate of perfectly crispy hash browns. Whether it’s a weekend brunch centerpiece, a hearty breakfast side, or even a satisfying late-night snack, golden-brown, shatteringly crisp hash browns are a crowd-pleaser. While they might seem simple, achieving that ideal crispiness requires a few key techniques. Forget those sad, limp excuses for hash browns you might have encountered. Today, we’re diving deep into how to make hash browns that are the star of the show, with a delightful crunch in every bite.
This recipe is all about maximizing flavor and texture. We’ll start with the potatoes, of course, but the way we prepare them, cook them, and season them makes all the difference. Don’t be intimidated; with a little patience and attention to detail, you’ll be whipping up diner-quality hash browns in your own kitchen.
Ingredients:
Cooking Instructions
Achieving that sought-after crispy texture is a multi-step process, and each step plays a crucial role. We’ll start with preparing our potatoes, which is arguably the most important phase for ensuring crispiness.
Preparing the Potatoes for Maximum Crispiness
This is where the magic begin extracts. You want to start with starchy potatoes, and Russets are our top pick for their high starch content, which translates to a fluffier interior and a crispier exterior. Begin extract by washing your potatoes thoroughly. You can peel them if you prefer a smoother hash brown, but leaving the skins on adds a rustic texture and a bit of extra flavor. Now, the critical part for crispiness: grating. Using the large holes of a box grater, grate the potatoes lengthwise. You’re looking for shreds, not cubes. Once grated, immediately place the shredded potatoes into a large bowl of cold water. This step is vital for removing excess starch, which can make the hash browns gummy. Let them soak for at least 10-15 minutes, agitating them occasionally. After soaking, drain the potatoes thoroughly. Then, you’ll need to squeeze out as much moisture as humanly possible. This is where you might get your hands dirty, but it’s absolutely essential. You can use cheesecloth, a clean kitchen towel, or even just your hands to wring out the water. The drier the potatoes, the crispier they will become. Spread the squeezed potatoes on a clean kitchen towel or paper towels and pat them dry again. This might seem like a lot of drying, but trust me, it’s the secret weapon for achieving that delightful crunch.
Seasoning for Flavor and Browning
Now that our potatoes are prepped and as dry as possible, it’s time to season them. In a clean, dry bowl, combine the grated potatoes with 1/2 teaspoon of salt and 1/4 teaspoon of black pepper. Gently toss them to distribute the seasoning evenly. Be careful not to overmix, as this can break down the potato shreds. If you’re using the optional butter, you can add it now, letting it melt slightly amongst the potatoes, or you can melt it in the pan later. The salt will start to draw out a little more moisture, but don’t worry; we’ve already done the heavy lifting with the squeezing. This initial seasoning is your base flavor, so don’t skimp!
The Art of Pan-Frying: Getting That Golden Crust
Heat your skillet over medium-high heat. Add the vegetable oil. You want the oil to be shimmering but not smoking. If you’re using the butter, add it now along with the oil, allowing it to melt and combine. A good non-stick skillet or a well-seasoned cast-iron skillet is ideal for this. Once the oil is hot, carefully add the seasoned potato shreds to the skillet. Don’t overcrowd the pan; you want to cook in batches if necessary. Overcrowding will steam the potatoes instead of frying them, resulting in soggy hash browns. Spread the potatoes out in a single, even layer. Resist the urge to stir or move them too much in the first few minutes. This is crucial for allowing a beautiful golden-brown crust to form. Let them cook undisturbed for about 5-7 minutes, or until the bottom is deeply golden and has started to crisp.
Flipping and Achieving Uniform Crispiness
Once the bottom has achieved a satisfactory crispiness, it’s time to flip. You can use a spatula to carefully flip sections of the hash browns. If they’re sticking a bit, don’t force them; just work gently to loosen them. The goal is to flip them over so that the uncooked side is now in contact with the hot skillet. Continue to cook for another 5-7 minutes on this side, again, resisting the urge to move them too much initially. You want to achieve a similar golden-brown crispiness on this second side. You can gently press down on the hash browns with your spatula occasionally to encourage even contact with the pan and promote crisping. If you notice any areas browning too quickly, you can adjust the heat slightly.
The Final Touch: Edges, Seasoning, and Serving
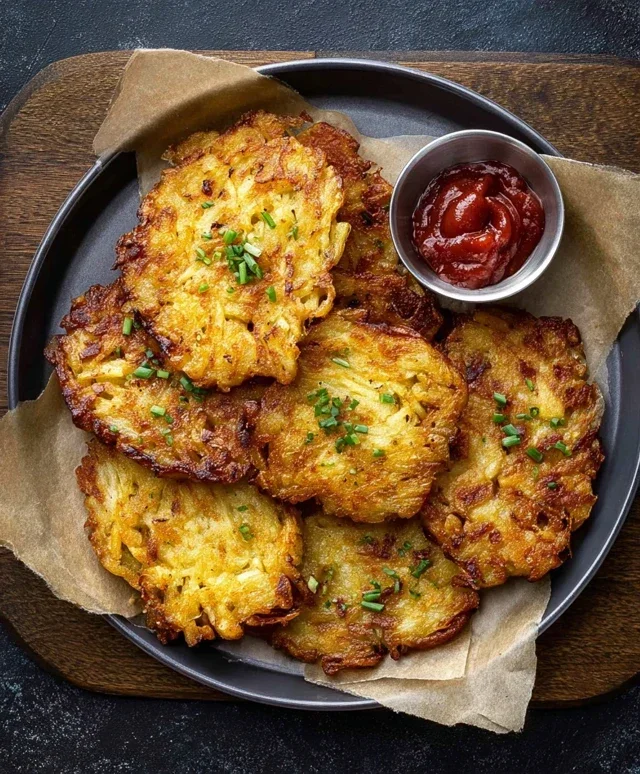
Once both sides have developed a lovely golden-brown color and are starting to feel crisp to the touch, you can continue to cook for a few more minutes, gently nudgin extractg and flipping them to ensure all edges are equally crispy. This might involve a few more flips over a slightly lower heat to really dry them out and achieve that perfect crunch. Taste a small piece to check for seasoning and add more salt and pepper if needed. The salt and pepper will adhere well to the crispy surface. For an extra touch of elegance and freshness, you can sprinkle with chopped fresh chives just before serving. A dollop of sour cream or a sprinkle of paprika can also elevate the dish. Serve immediately for the ultimate crispy hash brown experience! These are best enjoyed fresh off the skillet, so plan to serve them as soon as they’re ready.
Conclusion:
There you have it – the secrets to achieving truly crispy hash browns right in your own kitchen! This recipe is fantastic because it delivers that satisfying crunch you crave, without the fuss of complicated techniques. It’s a simple yet incredibly rewarding way to elevate your breakfast or brunch game, transforming humble potatoes into a golden, delicious masterpiece. The beauty of these hash browns lies in their versatility; they’re the perfect accompaniment to a classic fried egg and beef bacon, a hearty omelet, or even as a flavorful base for a breakfast burrito. Don’t be afraid to get creative with them!
For variations, consider adding finely diced onions or bell peppers to the potato mixture before frying for an extra burst of flavor. You could also experiment with different seasonings, like smoked paprika or a pinch of cayenne for a little heat. I truly encourage you to give this recipe a try – I’m confident you’ll be delighted with the results and wonder why you ever bought them from a restaurant!
Frequently Asked Questions:
Why are my hash browns not crispy enough?
The key to maximum crispiness is ensuring your potatoes are well-drained and dry before frying. Excess moisture will steam the potatoes instead of crisping them. Also, don’t overcrowd the pan; fry in batches to maintain a consistent oil temperature and allow each potato shred to get direct contact with the hot surface.
Can I make hash browns ahead of time?
While best enjoyed fresh, you can prepare the potato mixture ahead of time and store it in the refrigerator. However, to achieve the best crispiness, it’s highly recommended to cook them immediately before serving.
What kind of potatoes are best for hash browns?
Russet potatoes are ideal due to their high starch content, which helps create that fluffy interior and crispy exterior. Waxy potatoes tend to be too moist and may result in less crispy hash browns.
Crispy Hash Browns
Golden brown and wonderfully crispy hash browns, perfect for breakfast or brunch.
Ingredients
-
1 pound Russet potatoes, peeled and grated
-
1 tablespoon vegetable oil
-
1/4 teaspoon salt
-
1/8 teaspoon black pepper
-
1 tablespoon butter
-
1/4 cup finely chopped onion (optional)
Instructions
-
Step 1
Grate the peeled potatoes using the large holes of a box grater or a food processor. Squeeze out as much excess moisture as possible using a clean kitchen towel or cheesecloth. -
Step 2
In a bowl, combine the grated potatoes, salt, and pepper. If using, stir in the chopped onion. -
Step 3
Heat the vegetable oil and butter in a non-stick skillet over medium-high heat until shimmering. -
Step 4
Add the potato mixture to the hot skillet, spreading it into an even layer. Do not overcrowd the pan; cook in batches if necessary. -
Step 5
Cook for 5-7 minutes, undisturbed, until the bottom is golden brown and crispy. Carefully flip the hash browns using a spatula. -
Step 6
Continue to cook for another 5-7 minutes, or until the other side is also golden brown and crispy. Adjust heat as needed to prevent burning. -
Step 7
Serve immediately.
Important Information
Nutrition Facts (Per Serving)
It is important to consider this information as approximate and not to use it as definitive health advice.
Allergy Information
Please check ingredients for potential allergens and consult a health professional if in doubt.