Brown Butter Brookies – Rich & Decadent Dessert
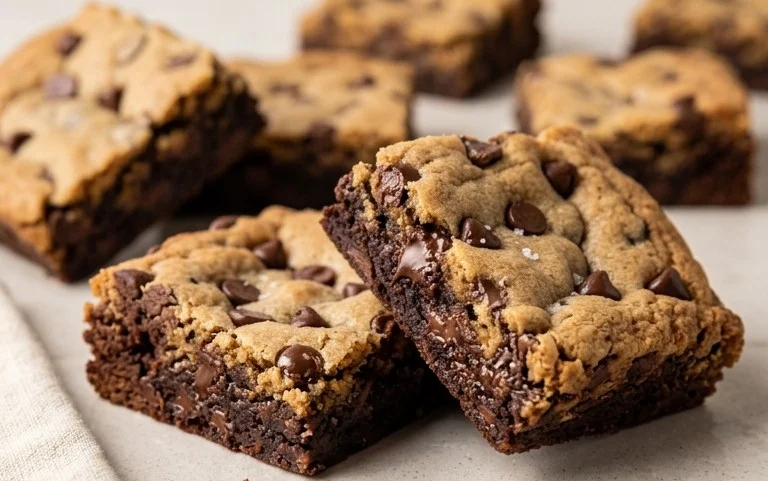
Brown Butter Brookies are about to become your new obsession. There’s something undeniably magical that happens when rich, fudgy brownie meets chewy, buttery cookie. It’s a dessert mashup made in heaven, a flavor and texture symphony that has captured the hearts (and taste buds) of countless dessert lovers. We’re not just talking about a simple swirl or a layered creation; we’re talking about a harmonious marriage of two beloved classics, elevated by the nutty, caramelized depth that only brown butter can provide. The secret to truly unforgettable Brown Butter Brookies lies in that transformative browning process, unlocking layers of toasted sweetness that will make you swoon. Get ready to experience the ultimate indulgence; these aren’t just brownies and cookies, they are the pinnacle of baked perfection.
Brown Butter Brookies
There are few things in life as utterly satisfying as a perfectly baked treat. And when you combine the rich, fudgy decadence of a brownie with the chewy, buttery goodness of a blondie, you get something truly magical: the brookie. But we’re not just making any brookies today. We’re elevating them with the nutty, caramelized magic of brown butter, transforming them into an irresistible masterpiece. The aroma that will fill your kitchen as these bake is a promise of pure bliss. Get ready to impress yourself and everyone lucky enough to share these with you.
Ingredients:
The Art of Brown Butter: Building the Foundation
The star of our show, brown butter, requires a little attention but is incredibly rewarding. In a medium saucepan, melt the 14.5 tablespoons of salted butter over medium heat. Watch it carefully. It will foam and then subside. As it continues to cook, you’ll notice tiny brown specks appearing at the bottom of the pan. Swirl the pan occasionally. The butter will turn a beautiful amber color and emit a wonderfully nutty aroma. This is your cue to immediately remove it from the heat and pour it into a heatproof bowl to stop the cooking process. Let it cool for about 10-15 minutes. This step is crucial for developing that deep, complex flavor that will make these brookies sing.
Crafting the Blondie Layer
In a large bowl, combine the cooled brown butter with the packed dark brown sugar and granulated sugar. Whisk vigorously until the mixture is smooth and well combined. This is where the structure of our blondie base begin extracts to form. Next, add the two large eggs, one at a time, whisking well after each addition until fully incorporated. Don’t rush this step; you want a cohesive, emulsified mixture. Stir in the vanilla extract.
In a separate medium bowl, whisk together the all-purpose flour, baking soda, baking powder, and salt. Gradually add the dry ingredients to the wet ingredients, mixing until just combined. Be careful not to overmix, as this can lead to tough cookies. Finally, gently fold in the 1.5 cups of chocolate chips. This batter will be thick and delicious.
Preparing the Rich Brownie Swirl
Now for the brownie magic! In a medium saucepan, melt the 3/4 cup of cubed salted butter over medium-low heat. Once melted, add the chopped semi-sweet chocolate (or chocolate chips) and whisk until smooth and completely melted. Remove from heat and whisk in the vegetable oil and cocoa powder until a smooth, glossy brownie batter forms. This brownie batter should be thinner than your blondie batter, which is exactly what we want for swirling. Make sure your three large eggs are at room temperature for the best emulsion. Whisk them into the brownie mixture one at a time until fully incorporated.
Assembling and Swirling the Brookies
Preheat your oven to 350°F (175°C). Line a 9×13 inch baking pan with parchment paper, leaving an overhang on the sides to help with lifting the baked brookies out. This is a lifesaver for easy cleanup and removal.
Spread about two-thirds of the blondie batter evenly into the prepared baking pan. Then, dollop spoonfuls of the brownie batter over the blondie layer. Using a knife or a skewer, gently swirl the brownie batter into the blondie batter. Don’t over-swirl; you want distinct ribbons of both flavors, not a muddy mess. You can even reserve a bit of the blondie batter to dollop on top for extra chocolatey pockets.
Baking to Perfection
Bake for 30-35 minutes, or until the edges are set and a toothpick inserted into the center comes out with moist crum extractbs attached. It’s important not to overbake, as this will result in a dry brookie. The center should still look slightly underbaked; it will continue to set as it cools.
Cooling and Enjoying
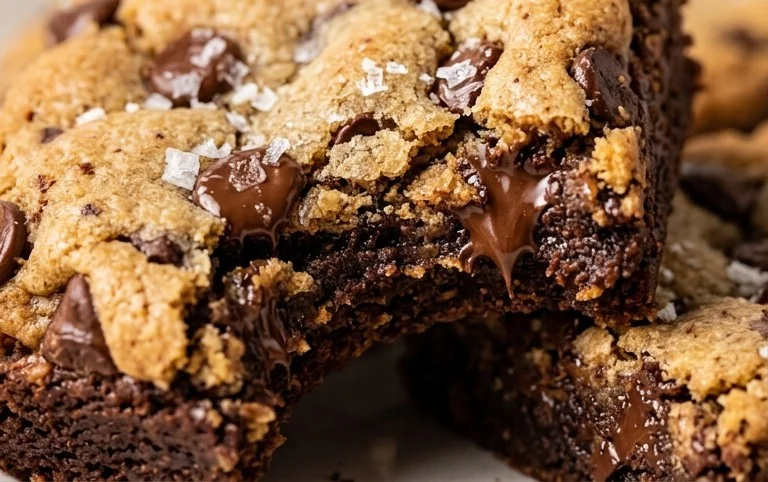
Let the brookies cool completely in the pan on a wire rack before lifting them out using the parchment paper overhang. This cooling period is critical for allowing the brookies to set properly and for the flavors to meld. Once completely cool, cut them into squares. The combination of the nutty brown butter blondie and the rich, fudgy brownie, studded with melty chocolate chips, is pure heaven. Enjoy these brown butter brookies with a glass of milk or a cup of coffee for the ultimate indulgence.
Conclusion:
And there you have it – the ultimate guide to creating incredibly decadent brown butter brookies! This recipe is truly a showstopper, perfectly marrying the rich, nutty notes of browned butter with the chewy perfection of a chocolate chip cookie and the fudgy intensity of a brownie. It’s the best of both worlds, offering a complex flavor profile and a delightful textural contrast that will have everyone reaching for a second (or third!) serving.
These brown butter brookies are fantastic on their own, but they also shine when served warm with a scoop of vanilla ice cream for an extra indulgent treat. For variations, consider adding white chocolate chips or chopped nuts to the brownie layer for added texture and flavor. Don’t be afraid to experiment! I truly encourage you to give this recipe a try; I promise the effort is more than worth the incredible reward. You’ll be amazed at how easily you can achieve bakery-worthy results right in your own kitchen.
Frequently Asked Questions:
Can I make the brownie and cookie layers separately?
Absolutely! While this recipe layers them directly for ease and flavor fusion, you can certainly bake each component separately and then layer them after cooling. This might offer slightly more control over the bake of each element.
My brown butter seems to have burned, what did I do wrong?
It’s a common concern! Browning butter is a delicate process. Keep your heat on medium-low and swirl the pan frequently. Watch for the milk solids to turn a golden brown and emit a nutty aroma. If you see black flecks or smell a burnt odor, unfortunately, it’s best to start over with fresh butter.
How should I store leftover brown butter brookies?
Store cooled brown butter brookies in an airtight container at room temperature for up to 3 days. For longer storage, you can refrigerate them for up to a week, or freeze them for up to 2 months. They are delicious slightly warmed up!
Brown Butter Brookies
Decadent brookies featuring a rich brown butter chocolate chip cookie layer and a fudgy brownie layer.
Ingredients
-
14.5 tbsp salted butter (206 grams)
-
3/4 cup dark brown sugar, packed (163 grams)
-
3/4 cup granulated sugar (156 grams)
-
2 large eggs, at room temperature
-
1 and 1/2 tsp vanilla extract
-
3 cups all-purpose flour, spooned & leveled or weighed out (390 grams)
-
1 tsp baking soda
-
1 tsp baking powder
-
1/2 salt
-
1 and 1/2 cups chocolate chips (270 grams)
-
3/4 cup salted butter, cubed (140 grams after browning)
-
4 ounces semi-sweet chocolate, chopped (113 grams)
-
1/4 cup vegetable oil (55 grams)
-
3/4 cup cocoa powder (63 grams)
-
3 large eggs, at room temperature
Instructions
-
Step 1
For the cookie layer: Melt 14.5 tbsp salted butter in a saucepan over medium heat until golden brown and fragrant. Let cool slightly. -
Step 2
In a large bowl, whisk together the browned butter, dark brown sugar, and granulated sugar until combined. Beat in 2 large eggs one at a time, then whisk in 1 and 1/2 tsp vanilla extract. -
Step 3
In a separate bowl, whisk together 3 cups all-purpose flour, 1 tsp baking soda, 1 tsp baking powder, and 1/2 salt. Gradually add the dry ingredients to the wet ingredients, mixing until just combined. Stir in 1 and 1/2 cups chocolate chips. -
Step 4
For the brownie layer: Melt 3/4 cup cubed salted butter in a heatproof bowl set over a saucepan of simmering water. Once melted, remove from heat and stir in 4 ounces chopped semi-sweet chocolate until smooth. Whisk in 1/4 cup vegetable oil and 3/4 cup cocoa powder until combined. -
Step 5
Whisk in 3 large eggs one at a time until smooth. Do not overmix. -
Step 6
Pour the brownie batter into a greased and floured 9×13 inch baking pan. Dollop spoonfuls of the cookie dough evenly over the brownie batter. Gently spread the cookie dough to cover the brownie batter as much as possible. -
Step 7
Bake at 350°F (175°C) for 30-35 minutes, or until a toothpick inserted into the center comes out with moist crumbs attached. Let cool completely before cutting into squares.
Important Information
Nutrition Facts (Per Serving)
It is important to consider this information as approximate and not to use it as definitive health advice.
Allergy Information
Please check ingredients for potential allergens and consult a health professional if in doubt.