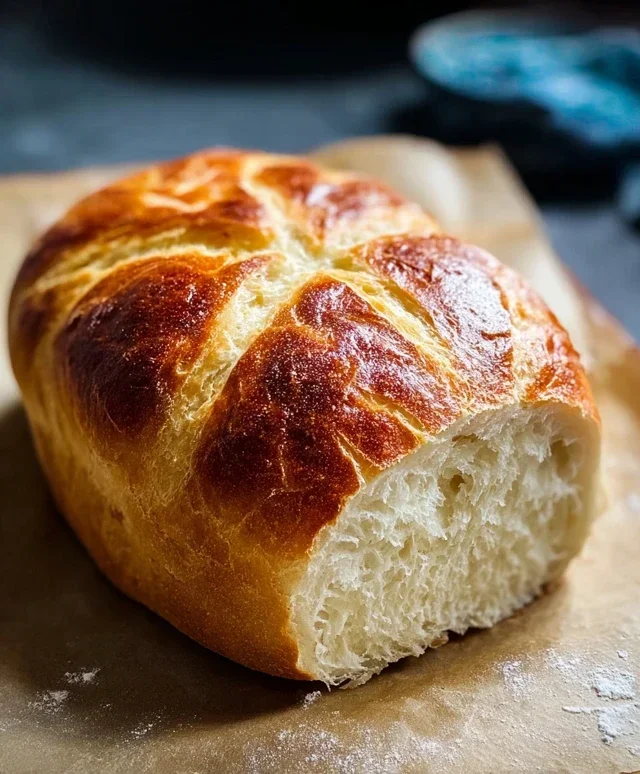
Easy Homemade Bread Recipe-Simple & Delicious
Easy homemade bread is a culinary adventure that awaits you, and trust me, it’s far more accessible than you might think. Forget those intimidating loaves from the bakery; we’re talking about a warm, crusty masterpiece crafted with your own two hands, right in your own kitchen. Why do we all fall in love with freshly baked bread? It’s the non-intoxicating aroma that fills your home, the satisfyingly soft interior, and that delightful crunch of the golden-brown crust. It’s comfort food at its finest, perfect for slathering with butter, dipping into soup, or building the ultimate sandwich. What makes our approach to easy homemade bread truly special is its simplicity. We’ve stripped away the complexity, focusing on a foolproof method that guarantees delicious results, even for absolute begin extractners. Get ready to experience the unparalleled joy of creating your own incredible loaf – you’ll be amazed at how simple and rewarding easy homemade bread can be.
Welcome to the Warm Embrace of Homemade Goodness!
Your Journey to Delicious Starts Here.
Easy Homemade Bread
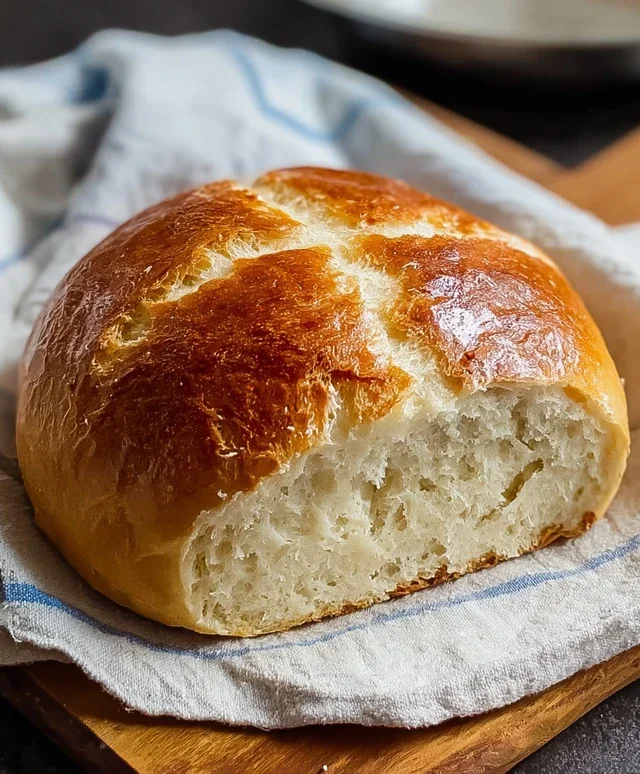
There’s something incredibly satisfying about pulling a warm, fragrant loaf of homemade bread from your own oven. The aroma alone can transform your kitchen into a cozy haven. Many people are intimidated by bread making, thinking it’s a complex and time-consuming process. But I’m here to tell you that it doesn’t have to be! This recipe for easy homemade bread is designed for begin extractners, requiring minimal fuss and delivering delicious results every time. You’ll be amazed at how simple it is to create a crusty exterior and a soft, chewy interior that rivals any bakery. So, let’s ditch the store-bought loaf and get baking!
Ingredients:
Let’s Get Baking!
This recipe is about simplicity and deliciousness. We’ll start with activating our yeast, then mix our dough, let it rise, shape it, and finally bake it to golden perfection. No fancy equipment is needed, just your hands and a little patience.
1. Activate the Yeast and Mix the Dough: In a large mixing bowl, pour in the warm water. It’s important that the water isn’t too hot, or it will kill the yeast, and not too cold, or it won’t activate properly. Think of it as comfortably warm to the touch, like a baby’s bathwater. Sprinkle the instant yeast over the warm water. Give it a gentle stir and let it sit for about 5-10 minutes. You’ll see it start to get foamy and bubbly – this is a sign that your yeast is alive and ready to work its magic! Once the yeast is foamy, add the bread flour and kosher salt to the bowl. Use a sturdy spoon or a spatula to mix everything together until a shaggy dough forms. Don’t worry if it looks a bit sticky and unappealing at this stage; that’s exactly what we want.
2. Knead the Dough: Now comes the fun part – kneading! Turn the shaggy dough out onto a lightly floured surface. You don’t need a lot of flour, just enough to prevent it from sticking. Start by gently pressing the dough down with the heels of your hands, then fold it over and push away. Repeat this motion, rotating the dough as you go. The dough will be sticky at first, but as you continue to knead, it will become smoother and more elastic. Aim to knead for about 8-10 minutes. You’ll know it’s ready when the dough is smooth, elastic, and springs back slowly when you poke it with your finger. If it’s still too sticky, add a tiny bit more flour, a tablespoon at a time. The goal is a pliable dough that’s easy to handle.
3. First Rise (Proofing): Lightly grease a clean, large bowl with a little oil or cooking spray. Place the kneaded dough into the greased bowl, turning it to coat all sides. Cover the bowl tightly with plastic wrap or a damp kitchen towel. Find a warm, draft-free spot in your kitchen for the dough to rise. This could be on top of a slightly warm (but not hot!) oven, or just in a sunny spot. Let the dough rise for about 1 to 1.5 hours, or until it has doubled in size. This is called proofing, and it’s where the yeast creates those beautiful air bubbles that give bread its texture. You’ll see a significant puffiness in the dough when it’s ready.
4. Shape the Loaf: Once the dough has doubled in size, gently punch it down to release the air. Turn the dough out onto a lightly floured surface again. At this point, you can shape it into your desired loaf. For a classic sandwich loaf, you can gently pat it into a rectangle and then roll it up tightly, pinching the seams to seal. Place the shaped loaf into a greased loaf pan (8.5×4.5 inch or 9×5 inch is standard). If you prefer a rustic, free-form loaf, you can simply shape it into a round or oval and place it on a baking sheet lined with parchment paper. For an even crispier crust on a free-form loaf, you can place it in a proofing basket (banneton) lined with a floured tea towel, or even a bowl lined with a floured tea towel.
5. Second Rise and Baking: Cover the shaped loaf loosely with plastic wrap or a kitchen towel and let it rise again for another 30-45 minutes, or until it looks puffy and has increased in size by about half. While the loaf is on its second rise, preheat your oven to 375°F (190°C). If you’re using a Dutch oven for a rustic loaf, preheat the Dutch oven in the oven. Once the loaf has completed its second rise, it’s ready for the oven! If you’re baking in a loaf pan, place it directly into the preheated oven. If you’re baking a free-form loaf, carefully transfer it to the hot baking sheet or Dutch oven. For an extra shiny crust, you can brush the top of the loaf with a little egg wash (one egg beaten with a tablespoon of water) or milk before baking. Bake for 30-40 minutes for a loaf pan, or 35-45 minutes for a free-form loaf in a Dutch oven, until the crust is deep golden brown and the loaf sounds hollow when tapped on the bottom. The internal temperature should reach around 195-200°F (90-93°C).
Once baked, remove the bread from the pan or baking sheet and let it cool completely on a wire rack before slicing. This is crucial for the texture to set properly. Enjoy your delicious, homemade bread!
Conclusion:
And there you have it – your very own loaf of easy homemade bread! We hope you’ve enjoyed this journey into simple baking. What makes this recipe so wonderful is its accessibility; it requires minimal fuss and common pantry ingredients, proving that delicious, fresh bread is within everyone’s reach. Imagin extracte the aroma filling your kitchen as it bakes, a scent that truly signifies comfort and warmth. This bread is incredibly versatile, perfect for toasting with butter and jam, serving alongside soups and stews, or as the base for delicious sandwiches. Don’t be afraid to experiment! Consider adding herbs like rosemary or garlic powder to the dough for a savory twist, or a sprinkle of seeds on top for added texture and flavor. Give this recipe a try; you’ll be amazed at how satisfying it is to create something so wholesome from scratch. Happy baking!
Frequently Asked Questions:
Q: My dough didn’t rise very much. What could be wrong?
A: Several factors can affect dough rise. Ensure your yeast was fresh and properly activated (if using active dry yeast). Water temperature is crucial; too hot can kill yeast, too cold can slow it down significantly. Also, check your rising environment; a warm, draft-free place is ideal. Patience is key – sometimes a slow rise just needs a little more time.
Q: Can I freeze this homemade bread?
A: Absolutely! Once completely cooled, wrap your loaf tightly in plastic wrap, then in foil or place it in a freezer-safe bag. It should stay fresh in the freezer for up to 3 months. Thaw at room temperature or toast slices directly from frozen.
Easy Homemade Bread
A simple and straightforward recipe for delicious homemade bread, perfect for beginners.
Ingredients
-
1 ½ cups warm water
-
3 cups bread flour
-
1 packet (2 ¼ teaspoons) Instant Yeast
-
2 ½ tsp kosher salt
Instructions
-
Step 1
In a large bowl, combine the warm water and yeast. Let it sit for about 5 minutes until foamy. -
Step 2
Add the bread flour and salt to the bowl with the yeast mixture. -
Step 3
Mix until a shaggy dough forms. Turn the dough out onto a lightly floured surface and knead for about 5-7 minutes until smooth and elastic. -
Step 4
Place the dough in a lightly oiled bowl, turning to coat. Cover the bowl with plastic wrap or a clean kitchen towel and let it rise in a warm place for about 1 hour, or until doubled in size. -
Step 5
Preheat your oven to 375°F (190°C). Punch down the dough and shape it into a loaf. -
Step 6
Place the loaf on a baking sheet or in a loaf pan. Bake for 30-35 minutes, or until golden brown and the internal temperature reaches 195-200°F (90-93°C). -
Step 7
Let the bread cool on a wire rack before slicing and serving.
Important Information
Nutrition Facts (Per Serving)
It is important to consider this information as approximate and not to use it as definitive health advice.
Allergy Information
Please check ingredients for potential allergens and consult a health professional if in doubt.