
Heinz Ketchup Copycat Recipe-Homemade Taste
Canned Ketchup Recipe (Heinz Copycat) is something I’ve been perfecting for a while, and let me tell you, the results are absolutely thrilling! We all have that one brand of ketchup that just screams comfort food, right? For so many of us, that’s the iconic red bottle with the familiar taste of Heinz. It’s more than just a condiment; it’s a flavor memory tied to countless backyard barbecues, late-night diner trips, and happy childhood meals. But what if I told you that you could capture that beloved, perfectly balanced sweetness and tang, right from your own pantry? This Canned Ketchup Recipe (Heinz Copycat) isn’t about reinventing the wheel; it’s about unlocking that secret sauce so you can have that signature taste on demand, whenever the craving strikes. Get ready to elevate your burgers, fries, and everything in between with this incredible, homemade version of your favorite canned ketchup.
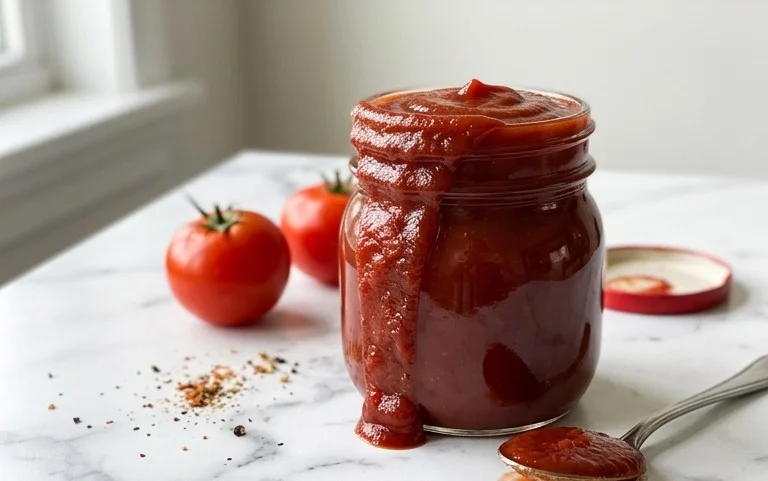
Heinz Copycat Ketchup: The Ultimate Canned Recipe
There’s something undeniably comforting about a bottle of classic ketchup. It’s the perfect accompaniment to fries, burgers, and a myriad of other dishes. But have you ever found yourself staring at an empty bottle, wishing you had a backup, or perhaps just wanting to recreate that iconic flavor at home? Well, prepare to be delighted, because we’re diving deep into the world of homemade ketchup with a recipe designed to mimic the beloved Heinz taste. This isn’t just any ketchup; it’s a carefully crafted blend that aims for that signature sweet, tangy, and slightly spiced profile. Making it from scratch allows you to control the quality of ingredients and, best of all, enjoy a generous batch that you can preserve for whenever the craving strikes. Forget those watery, bland imitations; this recipe will have you reaching for your homemade stash with pride.
Ingredients:
Now, let’s talk about that tomato juice. The asterisk is important here! While we list tomato juice for ease, the true essence of this recipe comes from 22 pounds of fresh, ripe tomatoes. If you’re feeling ambitious, you’ll want to simmer those fresh tomatoes, strain them to remove skins and seeds, and then measure out 7 quarts of the resulting juice. This step, while more labor-intensive, will yield a depth of flavor that is unparalleled. For those seeking a more streamlined approach, high-quality, unsalted tomato juice can be used, but be aware that the flavor will be slightly less robust. The vinegar provides that essential tang that cuts through the sweetness, while the sugar balances it out beautifully. The salt is crucial for bringin extractg all the flavors together and enhancing the tomato base. The spices – cinnamon, cloves, all-spice, and cayenne – are where the magic happens, providing that subtle, warm complexity that we associate with classic ketchup. Onion powder adds a savory depth without the need for fresh onions, which can sometimes lead to inconsistent texture. Finally, tomato paste concentrates the tomato flavor even further, and Thermflo, a modified cornstarch, is our secret weapon for achieving that perfect, thick ketchup consistency that coats the back of a spoon.
Cooking Instructions:
Phase 1: Combining and Simmering the Base
The journey to your perfect homemade ketchup begin extracts by creating the flavorful base. In a very large, heavy-bottomed pot or Dutch oven (you’ll need plenty of space!), combine the tomato juice, white distilled vinegar, sugar, salt, onion powder, cinnamon, ground cloves, all-spice, and cayenne pepper. If you’re using fresh tomato juice, ensure it’s already been processed as described above. Stir everything together thoroughly until the sugar and salt are mostly dissolved. Place the pot over medium-high heat and bring the mixture to a gentle boil. Once it reaches a boil, immediately reduce the heat to low, cover the pot loosely (allowing some steam to escape), and let it simmer. This initial simmering period is crucial for allowing the flavors to meld and the spices to infuse into the liquid. We’re aiming for about 2 to 3 hours of simmering. During this time, you’ll want to stir the mixture occasionally, perhaps every 30 minutes or so, to prevent any sticking or scorching on the bottom of the pot. The liquid will start to reduce and thicken slightly, concentrating those delicious tomato and spice notes.
Phase 2: Incorporating Tomato Paste and Further Reduction
After the initial simmering period, it’s time to deepen the tomato flavor even further. Add the 46 oz can of tomato paste to the pot. This is where your ketchup will really start to take on that rich, familiar hue and concentrated taste. Stir the tomato paste in very well, making sure it’s fully incorporated into the simmering liquid. You might notice it’s a bit stiff at first, but keep stirring until it’s smooth. Now, we’ll continue to simmer the ketchup, uncovered this time, for another 1 to 2 hours. This extended simmering period is essential for achieving a thick, luscious consistency. You’ll be looking for the mixture to reduce significantly. The exact time will depend on the heat of your stove and the initial thickness of your tomato juice, but you’ll know it’s getting close when you can run a spatula through the middle and the path it leaves takes a few seconds to fill back in. Again, remember to stir frequently to prevent sticking.
Phase 3: Thickening with Thermflo
This is the stage where we achieve that signature ketchup thickness. Once the ketchup has reduced to your desired consistency and is tasting delicious (careful, it’s hot!), it’s time to add the Thermflo. In a small bowl, whisk together the Thermflo with about 1/2 cup of cold water or some of the hot ketchup from the pot. Whisk it vigorously until it forms a smooth slurry with no lumps. This is important; adding dry Thermflo directly to the hot ketchup would result in clumps. Slowly pour this slurry into the simmering ketchup while stirring constantly. Continue to stir and simmer for another 5-10 minutes. You’ll notice the ketchup will thicken quite dramatically as the Thermflo activates. It should now be the perfect consistency for dipping and drizzling. Taste and adjust seasoning if needed – perhaps a touch more salt or a pinch more sugar, depending on your preference.
Phase 4: Cooling and Storage Preparation
Once your ketchup has reached the perfect thickness and flavor, it’s time to let it cool slightly before canning. Remove the pot from the heat and let it sit for about 15-20 minutes. This allows the initial intense heat to dissnon-alcoholic ipate, making it safer to handle for canning. While it’s cooling, prepare your canning jars and lids according to the manufacturer’s instructions. This typically involves washing them thoroughly and sterilizing them in boiling water. Ensure your lids are new and have been properly processed for sealing.
Phase 5: Canning for Longevity
Now for the final, crucial step: canning your delicious homemade ketchup. Carefully ladle the slightly cooled ketchup into your sterilized jars, leaving about 1/4 inch of headspace at the top. Wipe the rims of the jars clean with a damp cloth to ensure a good seal. Place the lids on the jars and screw on the bands until they are fingertip tight – not too tight, as air needs to escape during processing. Process the jars in a boiling water bath canner for the recommended time for your altitude (usually around 10 minutes for most areas). Once the processing time is complete, turn off the heat, remove the canner lid, and let the jars sit in the hot water for an additional 5 minutes. Carefully remove the jars from the canner and let them cool completely on a wire rack. You should hear the satisfying “ping” as the lids seal. Once cooled, check each lid for a firm seal by pressing on the center. Any jars that haven’t senon-alcoholic aled should be refrigerated and used within a few weeks. Properly canned ketchup can be stored in a cool, dark place for up to a year. Enjoy your incredible Heinz copycat ketchup!

Conclusion:
I hope you’re as excited as I am about making your very own canned ketchup recipe that rivals your favorite store-bought brand, especially that iconic Heinz taste! This recipe is fantastic because it allows you complete control over the ingredients, meaning no high-fructose corn syrup or artificial preservatives if you choose to omit them. You can achieve that perfect balance of sweet, tangy, and savory in your own kitchen. This homemade ketchup is incredibly versatile and will elevate all your favorite dishes. Serve it alongside classic burgers and fries, use it as a base for BBQ sauces, or even add a dollop to scrambled eggs for an unexpected burst of flavor. Don’t be afraid to get creative with variations! Consider adding a pinch of cayenne for a spicy kick, a dash of smoked paprika for a deeper flavor profile, or even a touch of honey for an extra layer of sweetness. I truly encourage you to give this Heinz copycat recipe a try. You’ll be amazed at how easy it is and how delicious the results are. Enjoy creating your perfect condiment!
Frequently Asked Questions:
Can I make this ketchup thicker if I prefer a chunkier texture?
Absolutely! If you prefer a thicker consistency, you can simmer the ketchup uncovered for a slightly longer period, allowing more liquid to evaporate. Alternatively, you can blend a small amount of cooked potato or a cornstarch slurry (1 tablespoon cornstarch mixed with 2 tablespoons cold water) into the simmering ketchup towards the end of the cooking time. Be sure to stir constantly when adding the slurry and let it thicken.
How long will this homemade ketchup last in the refrigerator?
When stored in an airtight container in the refrigerator, this canned ketchup recipe should last for at least 2-3 weeks. The vinegar acts as a natural preservative, but it’s always best to check for any signs of spoilage before using.
What kind of tomatoes should I use for the best flavor?
For the most authentic and robust tomato flavor, I recommend using ripe, paste tomatoes like Roma or San Marzano. These varieties have less water content and more natural sweetness, which is ideal for a concentrated ketchup. Using fresh, in-season tomatoes will yield the best results.
Canned Ketchup Recipe (Heinz Copycat)
A homemade ketchup recipe that mimics the classic Heinz flavor profile using canned ingredients for convenience.
Ingredients
-
7 quarts tomato juice (from 22 lbs fresh tomatoes)
-
4 cups white distilled vinegar
-
3 cups sugar
-
5 Tbsp salt
-
1 Tbsp onion powder
-
1/2 tsp cinnamon
-
1/2 tsp ground cloves
-
1/2 tsp all-spice
-
1/2 tsp cayenne pepper
-
46 oz tomato paste
-
1/3 cup Thermflo (heaping)
Instructions
-
Step 1
In a large pot, combine tomato juice, white distilled vinegar, sugar, salt, onion powder, cinnamon, ground cloves, all-spice, and cayenne pepper. Stir well to dissolve the sugar and salt. -
Step 2
Add the tomato paste to the pot and stir until thoroughly incorporated into the liquid mixture. -
Step 3
Bring the mixture to a boil over medium-high heat, then reduce the heat to low, cover, and simmer for at least 1 hour, stirring occasionally. The longer it simmers, the richer the flavor will become. -
Step 4
In a small bowl, whisk the Thermflo with about 1/2 cup of the hot ketchup mixture until smooth. This prevents lumps. -
Step 5
Gradually whisk the Thermflo slurry back into the main pot of ketchup. Continue to simmer, uncovered, for another 30 minutes, stirring frequently, until the ketchup has thickened to your desired consistency. -
Step 6
Remove from heat and let cool slightly. For a smoother ketchup, you can blend it with an immersion blender or in batches in a regular blender before it cools completely. Be careful when blending hot liquids. -
Step 7
Pour the cooled ketchup into sterilized jars or bottles. Store in the refrigerator. The ketchup will thicken further as it cools.
Important Information
Nutrition Facts (Per Serving)
It is important to consider this information as approximate and not to use it as definitive health advice.
Allergy Information
Please check ingredients for potential allergens and consult a health professional if in doubt.