Homemade Oreo Cookies- Easy Chocolate Sandwich Cookies
Homemade Oreo cookies are a dream come true for any cookie lover, and I’m thrilled to share how you can bring this iconic treat into your own kitchen. Forget those store-bought versions; there’s an unparalleled joy in creating your own authentic homemade Oreo cookies from scratch. The satisfaction of biting into a perfectly crisp chocolate cookie sandwiching a sweet, creamy filling is simply unmatched. What is it about Oreos that captivates us all? It’s that irresistible combination of intensely dark, slightly bitter chocolate wafers and that lusciously sweet, vanilla-infused creme. It’s a flavor profile that evokes childhood memories and pure comfort. Making them yourself allows you to control the ingredients, ensuring a fresh, superior taste and texture that store-bought options often can’t replicate. Get ready to experience the magic of truly exceptional homemade Oreo cookies!
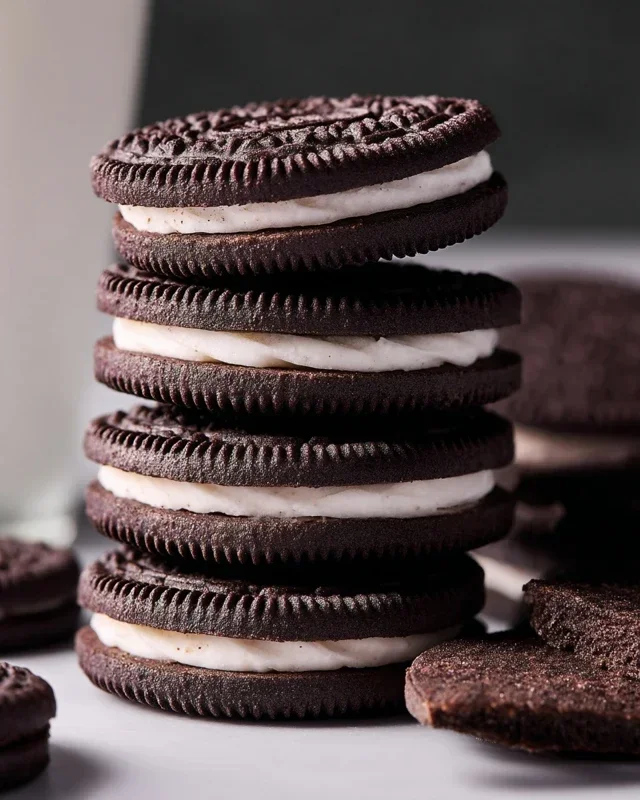
Homemade Oreo Cookies
There’s something undeniably special about a classic Oreo cookie. That crisp, dark chocolate cookie sandwiching a sweet, creamy filling is a taste of pure nostalgia. While store-bought Oreos are undeniably convenient, crafting them from scratch allows for a deeper appreciation of the simple ingredients that come together to create such an iconic treat. Plus, the satisfaction of biting into your own homemade version? Unbeatable. Forget that dive into the cookie aisle; we’re about to embark on a journey to create your very own batch of deeply satisfying, homemade Oreo cookies. This recipe requires a little patience and a touch of precision, but I promise you, the results will be well worth the effort. Get ready to impress yourself and anyone lucky enough to share these with you!
Ingredients:
Making the Dark Chocolate Cookies
The foundation of our homemade Oreos is, of course, that intensely dark and crisp chocolate cookie. Getting the texture and flavor just right is key, and it all starts with combining our dry ingredients.
1. In a medium bowl, whisk together the all-purpose flour, cocoa powder (Dutch-process will give you a rich, dark brown, while black cocoa powder will achieve that signature jet-black hue, though it can be harder to find), baking soda, baking powder, and 1/4 teaspoon of fine sea salt. Whisking these together ensures even distribution of the leavening agents and salt, which is crucial for consistent cookie texture. Set this dry mixture aside.
2. In the bowl of a stand mixer fitted with the paddle attachment (or using a hand mixer and a large bowl), cream together the granulated sugar and the first portion of unsalted butter (10 tablespoons, cut into chunks). You want to cream these until they are light and fluffy, which usually takes about 3-5 minutes. This process incorporates air into the butter and sugar, which contributes to the cookie’s tender crum extractb. Don’t rush this step; a well-creamed base makes a world of difference.
3. Add the room temperature large egg to the creamed butter and sugar mixture. Beat on medium speed until just combined. Then, gradually add the dry ingredients from step 1 to the wet ingredients. Mix on low speed until just combined and no dry streaks of flour remain. Be careful not to overmix at this stage; overmixing can develop the gluten in the flour, leading to tougher cookies. The dough will be quite stiff and may look a bit crum extractbly at first, but it should come together.
4. Turn the dough out onto a lightly floured surface. Divide the dough in half. Gently shape each half into a flat disc, wrap tightly in plastic wrap, and refrigerate for at least 1 hour, or up to 2 days. Chilling the dough is a non-negotiable step. It solidifies the butter, making the dough easier to roll out and preventing the cookies from spreading excessively during baking, ensuring those nice, crisp edges and that characteristic cookie shape.
Rolling, Cutting, and Baking the Cookies
Once the dough is properly chilled, we can move on to shaping our cookies.
5. Preheat your oven to 350°F (175°C). Line baking sheets with parchment paper. Take one disc of chilled dough out of the refrigerator and let it sit at room temperature for a few minutes to soften slightly, just enough to be workable but still firm. On a lightly floured surface, roll out the dough to about 1/8-inch thickness. It’s important to roll it evenly so that the cookies bake uniformly. Use a round cookie cutter, about 1 ½ to 2 inches in diameter, to cut out your cookie shapes. Gently re-roll the scraps, taking care not to overwork the dough, and cut more cookies. Transfer the cut-out cookies to the prepared baking sheets, leaving about 1 inch between them. Bake for 9-11 minutes, or until the edges are set and the cookies feel firm to the touch. Do not overbake, as they will continue to firm up as they cool. Let the cookies cool on the baking sheets for 5 minutes before transferring them to a wire rack to cool completely. While they’re cooling, we can get started on that delightful creme filling!
Crafting the Creamy Vanilla Filling
This is where our homemade Oreos truly start to mimic the classic. The filling should be sweet, creamy, and have that distinct vanilla flavor.
1. In a medium bowl, beat together the remaining stick (113 grams) of unsalted butter (also at a cool room temperature) with the pure vanilla extract and 1/8 teaspoon of fine sea salt until smooth and creamy.
2. Gradually add the sifted powdered sugar to the butter mixture, about a cup at a time, beating on low speed until each addition is incorporated. Sifting the powdered sugar is essential to avoid lumps and achieve a silky-smooth filling. Once all the powdered sugar is added, increase the speed to medium-high and beat for another 2-3 minutes until the filling is light, fluffy, and very smooth. This aeration is what gives the filling its characteristic cloud-like texture.
Assembling Your Homemade Oreos
The final, most satisfying step: bringin extractg it all together!
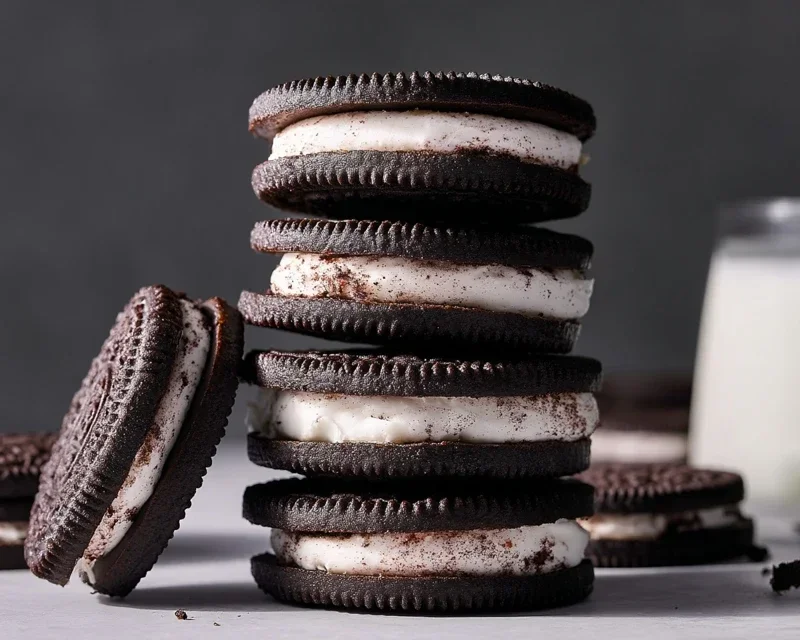
1. Once both the chocolate cookies and the vanilla filling have completely cooled, it’s time to assemble. Take one chocolate cookie and spread a generous dollop of the vanilla filling onto the flat side. Then, take another chocolate cookie and place it on top, pressing gently to sandwich the filling. Repeat this process until all your cookies are assembled. Store your beautiful, homemade Oreo cookies in an airtight container at room temperature for up to 3-4 days. Enjoy the taste of pure homemade goodness!
Conclusion:
Congratulations on mastering the art of homemade Oreo cookies! You’ve now unlocked the secret to a truly superior cookie experience – one that boasts a perfectly crisp dark chocolate cookie shell and that irresistibly creamy, sweet filling. Forget the store-bought versions; these homemade delights are a testament to your baking prowess and offer a satisfyingly rich flavor that’s simply unparalleled. They’re not just cookies; they’re edible works of art that will impress family and friends alike.
These homemade Oreos are incredibly versatile. Enjoy them dunked in a cold glass of milk, paired with a hot cup of coffee, or even crum extractbled over ice cream for an extra decadent dessert. For those feeling adventurous, consider experimenting with variations! You could try adding a hint of peppermint extract to the filling for a minty twist, or even incorporate a sprinkle of espresso powder into the cookie dough for a mocha-infused treat. The possibilities are truly endless when you’re in control of the ingredients. So go ahead, embrace your inner baker, and give this fantastic recipe a try. You won’t regret it!
Frequently Asked Questions:
Why are my homemade Oreo cookies not as dark as store-bought ones?
The intensity of the dark chocolate color in store-bought Oreos often comes from a specific type of Dutch-processed cocoa powder and sometimes food coloring. To achieve a darker color at home, use a high-quality Dutch-processed cocoa powder. You can also experiment with adding a tiny bit of black food coloring to the dough, but natural cocoa and sufficient dark chocolate will give you a delicious, albeit perhaps slightly less intensely black, cookie.
Can I make the cream filling ahead of time?
Absolutely! The cream filling can be made a day or two in advance and stored in an airtight container in the refrigerator. You may need to let it sit at room temperature for about 15-20 minutes and give it a quick stir before piping it onto your cookies, as it can firm up slightly in the fridge.
Homemade Oreo Cookies
Recreate the iconic chocolate sandwich cookie at home with this easy recipe for homemade Oreo cookies, complete with a creamy vanilla filling.
Ingredients
-
1 1/4 cups (159 grams) all-purpose flour
-
1/2 cup (43 grams) Dutch-process cocoa powder or Black cocoa powder
-
1 teaspoon baking soda
-
1/4 teaspoon baking powder
-
1/4 teaspoon fine sea salt
-
1 cup (200 grams) granulated sugar
-
10 tablespoons (142 grams) unsalted butter, (at a cool room temperature, cut into chunks)
-
1 large egg, (at room temperature)
-
1 stick (113 grams) unsalted butter, (at a cool room temperature)
-
2 1/2 teaspoons pure vanilla extract
-
2 1/2 cups (313 grams) powdered sugar, (sifted)
-
1/8 teaspoon fine sea salt
Instructions
-
Step 1
In a medium bowl, whisk together the flour, cocoa powder, baking soda, baking powder, and 1/4 teaspoon salt. Set aside. -
Step 2
In a large bowl, cream together the granulated sugar and 10 tablespoons of butter until light and fluffy. Beat in the egg and vanilla extract until well combined. -
Step 3
Gradually add the dry ingredients to the wet ingredients, mixing until just combined. The dough will be stiff. -
Step 4
Divide the dough in half, flatten each half into a disk, wrap in plastic wrap, and refrigerate for at least 1 hour. -
Step 5
Preheat oven to 350°F (175°C). Line baking sheets with parchment paper. Roll out one disk of dough to about 1/8-inch thickness. Cut out rounds using a 1.5-inch cookie cutter and place on the prepared baking sheets. -
Step 6
Bake for 8-10 minutes, or until firm. Let cool on the baking sheets for a few minutes before transferring to a wire rack to cool completely. -
Step 7
For the filling, beat the remaining 1 stick of butter until creamy. Gradually add the sifted powdered sugar and 1/8 teaspoon salt, beating until smooth and fluffy. Stir in the remaining vanilla extract. -
Step 8
Spread or pipe a generous amount of filling onto the flat side of one cookie and top with another cookie, pressing gently to form a sandwich. Repeat with remaining cookies.
Important Information
Nutrition Facts (Per Serving)
It is important to consider this information as approximate and not to use it as definitive health advice.
Allergy Information
Please check ingredients for potential allergens and consult a health professional if in doubt.