No Bake Oreo Nutella Cheesecake Delight
No Bake Oreo Nutella Cheesecake. Sound good? I thought so! If you’re anything like me, the thought of rich, creamy cheesecake combined with the irresistible duo of Oreo cookies and Nutella is enough to make your taste buds do a happy dance. This No Bake Oreo Nutella Cheesecake is more than just a dessert; it’s a guaranteed crowd-pleaser, a shortcut to pure happiness on a plate. What makes this particular no-bake wonder so special? It’s the perfect harmony of textures and flavors: the crum extractbly, chocolatey Oreo crust provides a fantastic foundation for the impossibly smooth, velvety filling. Then comes that glorious swirl of hazelnut-chocolate goodness that elevates this No Bake Oreo Nutella Cheesecake from simply delicious to utterly decadent. And the best part? No oven required! It’s the ultimate stress-free indulgence for any occasion, or, let’s be honest, for a Tuesday night treat.
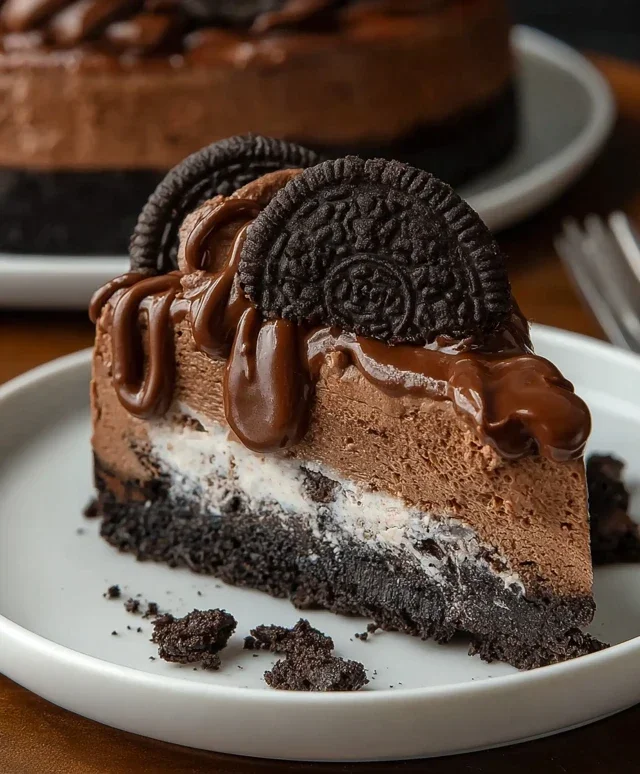
No Bake Oreo Nutella Cheesecake
Get ready to experience pure indulgence with this incredibly easy No Bake Oreo Nutella Cheesecake. It’s the perfect dessert for any occasion, from casual gatherings to impressive dinner parties. The rich, creamy cheesecake filling is swirled with decadent Nutella and studded with chunks of Oreo, all resting on a buttery Oreo crust. And the best part? No oven required! This recipe is designed for maximum flavor with minimal effort, making it a guaranteed crowd-pleaser.
Ingredients:
Instructions:
Step 1: Prepare the Oreo Crust
First things first, let’s get our delicious Oreo crust ready. Take your 200g of crushed Oreos and place them into a medium-sized bowl. Make sure they are finely crushed, almost like coarse sand. You can achieve this by placing them in a zip-top bag and crushing them with a rolling pin, or by using a food processor for a quicker, more consistent result. Next, pour in the 50g of melted butter. Mix this thoroughly until all the Oreo crum extractbs are evenly moistened. The mixture should resemble wet sand that holds together when you squeeze it. Now, take a 20-23cm (8-9 inch) springform pan. You can lightly grease the base of the pan if you wish, though the butter in the crust usually prevents sticking. Spoon the Oreo crum extractb mixture into the prepared pan and press it down firmly and evenly across the bottom. Use the back of a spoon or the base of a glass to create a compact, solid layer. You want this crust to be sturdy enough to hold the cheesecake filling. Place the prepared crust in the freezer for at least 10-15 minutes while you prepare the filling. This helps to set the crust and makes it easier to remove from the pan later.
Step 2: Create the Creamy Nutella Cheesecake Filling
In a large mixing bowl, combine the 500g of softened cream cheese and the 200g of Nutella. It’s crucial that the cream cheese is at room temperature; this ensures a smooth, lump-free filling. If it’s too cold, it will be difficult to incorporate smoothly with the Nutella. Beat these two ingredients together using an electric mixer on medium speed until they are completely combined and wonderfully smooth. Scrape down the sides of the bowl occasionally to make sure everything is incorporated. Once you have a smooth, uniform mixture, set it aside for a moment. In a separate, clean bowl, whip the 200g of heavy whipping cream with the 50g of sugar. Beat on medium-high speed until stiff peaks form. This means that when you lift the whisk, the cream will stand up straight without falling over. Be careful not to over-whip, as this can turn the cream into butter. Gently fold about one-third of the whipped cream into the cream cheese and Nutella mixture. This lightens the mixture and makes it easier to incorporate the remaining whipped cream. Then, gently fold in the rest of the whipped cream until just combined. Be gentle to keep the air in the whipped cream, which will make your cheesecake light and fluffy.
Step 3: Assemble the Cheesecake Layers
Now it’s time to bring all those delicious components together. Retrieve your chilled Oreo crust from the freezer. Spoon about half of the Nutella cheesecake filling over the crust, spreading it evenly to cover the base. Next, dollop about half of the remaining 100g of Nutella over the filling. Don’t worry about making it neat; we’re going for a beautiful swirl effect. Then, sprinkle half of the 100g of chopped Oreos over the Nutella. Now, repeat the process: spoon the remaining cheesecake filling over the Nutella and Oreo layer, spreading it to create a smooth top. Dollop the rest of the Nutella on top of this layer and use a skewer or a knife to gently swirl the Nutella into the cheesecake filling. You can create patterns or just a marbled effect; it’s entirely up to your artistic flair! Finally, sprinkle the remaining chopped Oreos over the top of the cheesecake, adding another delightful crunch.
Step 4: Chill and Set the Cheesecake
This is the “no bake” part that requires patience! Once your cheesecake is assembled, cover it tightly with plastic wrap. Make sure the plastic wrap touches the surface of the cheesecake to prevent a skin from forming. Place the cheesecake in the refrigerator and let it chill for a minimum of 6 hours, but ideally overnight. This chilling period is crucial for the cheesecake to set properly. The cream cheese needs time to firm up, and the flavors need time to meld together. If you try to slice it too soon, it will be too soft and might fall apart. So, resist the urge to peek!
Step 5: Decorate and Serve Your Masterpiece
Once your No Bake Oreo Nutella Cheesecake has set beautifully, it’s time for the final flourish. Carefully run a knife around the edge of the springform pan before releasing the sides. This helps to ensure a clean release. For an extra touch of decadence, warm up the 100g of Nutella slightly (just a few seconds in the microwave or over a double boiler until it’s pourable but not hot). Drizzle this warmed Nutella generously over the top of the cheesecake. Then, dust the top with the 5 crushed Oreos (without the filling) for a delicate sprinkle of cookie goodness. Finally, arrange the 6 whole Oreos around the edges or on top of the cheesecake for a truly show-stopping presentation. Slice into generous portions and enjoy the incredible combination of crunchy Oreos, smooth cream cheese, and rich Nutella. This cheesecake is best served chilled. You can store any leftovers in an airtight container in the refrigerator for up to 3-4 days.

Conclusion:
There you have it – the easiest, most decadent No Bake Oreo Nutella Cheesecake you’ll ever make! This recipe is an absolute winner because it delivers all the rich, creamy, chocolatey indulgence of a traditional cheesecake without any of the baking hassle. The delightful crunch of Oreos in the crust perfectly complements the smooth, velvety Nutella-infused filling, creating a flavor combination that’s simply irresistible. It’s the perfect dessert for busy weeknights, last-minute gatherings, or anytime you crave a truly special treat. Serve it chilled for the ultimate refreshment, perhaps with a dollop of whipped cream and a few extra Oreo crum extractbles or a drizzle of Nutella for an extra flourish. You can also easily customize this cheesecake by adding chocolate chips to the filling or a swirl of caramel sauce. I highly encourage you to give this No Bake Oreo Nutella Cheesecake a try – I promise it will become a go-to favorite!
Frequently Asked Questions:
How far in advance can I make this cheesecake?
You can prepare this cheesecake up to 2 days in advance. Just ensure it’s kept tightly covered in the refrigerator. The flavors will meld beautifully overnight, making it even more delicious!
Can I make this cheesecake dairy-free or vegan?
Yes, with a few simple substitutions! For a dairy-free and vegan version, use vegan cream cheese, vegan butter for the crust, and ensure your Oreos are vegan-certified (many are!). For the filling, you can use coconut cream or a rich cashew cream instead of heavy cream, and confirm your Nutella alternative is vegan.
What if I don’t have a springform pan?
No problem! You can use a regular pie plate or a round cake pan. If using a pie plate, simply press the crust evenly into the bottom and up the sides. For a regular cake pan, line it with parchment paper, leaving some overhang on the sides to help you lift the cheesecake out easily after chilling.
No Bake Oreo Nutella Cheesecake
A decadent no-bake cheesecake featuring a crunchy Oreo crust, smooth Nutella cheesecake filling, and topped with more Oreos and drizzled Nutella.
Ingredients
-
200g crushed Oreos
-
50g melted butter
-
500g cream cheese, softened
-
200g Nutella
-
200g heavy whipping cream (35%)
-
50g sugar
-
100g chopped Oreos
-
100g Nutella
-
100g Nutella, warmed for drizzling
-
5 crushed Oreos (no filling)
-
6 whole Oreos for garnish
Instructions
-
Step 1
For the crust, combine the crushed Oreos and melted butter. Press firmly into the base of a 20cm (8 inch) springform pan. -
Step 2
In a large bowl, beat the softened cream cheese until smooth. Beat in 200g of Nutella until well combined. -
Step 3
In a separate bowl, whip the heavy cream and sugar until stiff peaks form. -
Step 4
Gently fold the whipped cream into the cream cheese and Nutella mixture. Stir in the 100g chopped Oreos and 100g Nutella. -
Step 5
Pour the cheesecake mixture over the Oreo crust and spread evenly. Chill in the refrigerator for at least 4 hours, or until firm. -
Step 6
Before serving, drizzle with warmed Nutella. Garnish with whole Oreos and the crushed Oreos (no filling).
Important Information
Nutrition Facts (Per Serving)
It is important to consider this information as approximate and not to use it as definitive health advice.
Allergy Information
Please check ingredients for potential allergens and consult a health professional if in doubt.