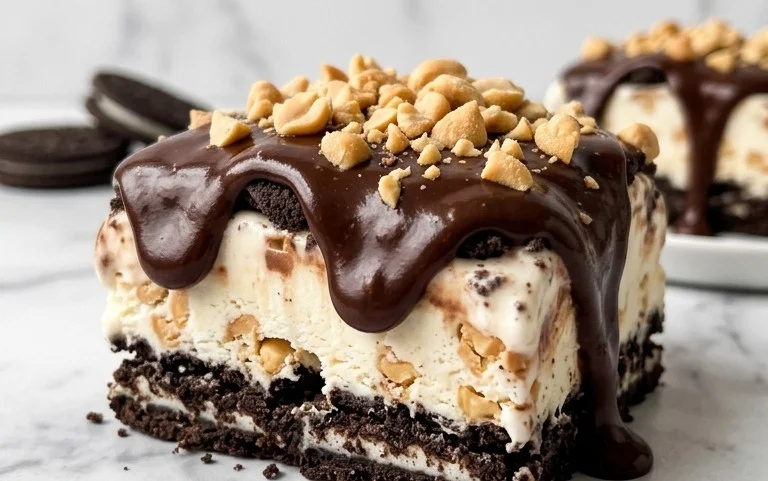
Chocolate Dipped Fruit Cones-Easy Dessert Recipe
Chocolate Dipped Fruit Filled Cones are a delightful treat that promises to transport your taste buds to a place of pure joy. Imagin extracte the satisfying crunch of a perfectly baked cone, cradling a burst of vibrant, fresh fruit, all lovingly enrobed in a decadent coating of rich chocolate. It’s a symphony of textures and flavors that simply can’t be resisted. What is it about these simple yet elegant creations that captivates us? Perhaps it’s the nostalgic nod to childhood ice cream cones, elevated with a sophisticated twist. Or maybe it’s the effortless elegance they bring to any occasion, from casual gatherings to more formal celebrations. These Chocolate Dipped Fruit Filled Cones are special because they offer a perfect balance – the sweetness of the chocolate, the natural tang of the fruit, and the comforting crispness of the cone, all coming together in a handheld masterpiece. They are surprisingly simple to make, yet they deliver an impressive impact, making them a guaranteed crowd-pleaser.
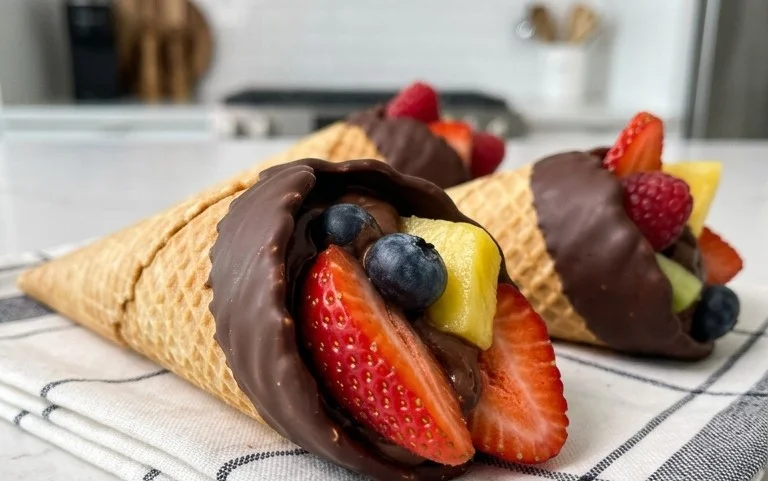
Chocolate Dipped Fruit Filled Cones
There’s something utterly magical about a beautifully decorated cone, isn’t there? And what if I told you we could elevate that simple cone into a decadent dessert experience? Today, we’re diving into the delightful world of Chocolate Dipped Fruit Filled Cones. These aren’t your average ice cream cones; they are a symphony of textures and flavors, combining the satisfying crunch of a chocolate-coated cone with the sweet, slightly tart burst of fresh fruit, all nestled within a creamy filling. They’re perfect for parties, a special treat, or just because you deserve something extraordinary. Let’s get started!
Ingredients:
Preparing Your Cones
The foundation of our delightful creation is the cone itself. We’re going to transform these humble wrappers into edible works of art. The first step is to get your chocolate ready for dipping. It’s crucial to use good quality chocolate for the best flavor and melting consistency.
1. Melting the Chocolate: You have a couple of excellent options for melting your chocolate. The most common method is the double boiler. Fill the bottom of a saucepan with about an inch of water and bring it to a simmer over medium-low heat. Place the finely chopped dark chocolate in a heatproof bowl that fits snugly over the saucepan without touching the water. Stir gently and continuously until the chocolate is completely melted and smooth. Alternatively, you can melt the chocolate in the microwave in 30-second intervals, stirring well between each interval, until it’s smooth. Be careful not to overheat chocolate, as it can seize and become unusable. Repeat this process with the milk chocolate in a separate bowl.
2. Dipping the Cones: Once your chocolate is beautifully melted and smooth, it’s time for the exciting part – dipping! You can dip the entire cone if you’re feeling bold and want maximum chocolatey goodness, or just dip the top half for a more elegant look. Hold a waffle cone by its flat end and carefully dip the open end into the melted dark chocolate, swirling gently to coat the inside and the rim. Use a spoon to help coat the inside if needed. Lift the cone and allow any excess chocolate to drip back into the bowl. It’s helpful to have a piece of parchment paper or a silicone mat laid out on a baking sheet. Place the dipped cones onto the prepared surface, chocolate-side up, and let the chocolate set. You can speed this up by placing the baking sheet in the refrigerator for about 10-15 minutes. Repeat this process with the milk chocolate. You can even do a double dip, letting the first layer set before dipping again for a thicker coating.
Creating the Creamy Filling
While our dipped cones are setting, we’ll prepare the luscious filling that will tie everything together. This is a simple yet elegant whipped cream that provides a perfect contrast to the rich chocolate and fresh fruit.
3. Whipping the Cream: In a chilled mixing bowl, combine the heavy whipping cream and the powdered sugar. Using an electric mixer (or a whisk and a lot of determination!), beat the cream and sugar on medium-high speed. You’re looking for soft to medium peaks to form. This means that when you lift the beaters, the cream will hold its shape but the tip will curl over slightly. Add the vanilla extract and continue to beat for just a few more seconds until it’s incorporated. Be careful not to over-whip, or you’ll end up with butter! The mixture should be light, airy, and hold its shape beautifully.
Assembling Your Masterpieces
Now for the grand finnon-alcoholic ale – putting all these delicious components together! This is where your creativity can really shine.
4. Filling the Cones: Once the chocolate on your cones is firm to the touch, it’s time to fill them. Gently spoon or pipe the whipped cream into the chocolate-lined cones. Don’t overfill them just yet; leave a little space at the top for the fruit. We want a nice, even layer of cream. If you have a piping bag with a star tip, this is the perfect opportunity to create a beautiful swirl of whipped cream.
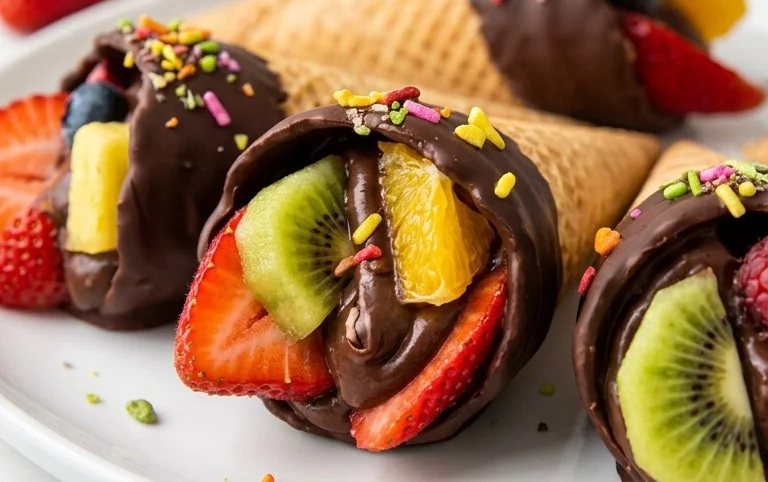
5. Adding the Fruit and Decorating: The final touch is to add the fresh, vibrant fruit. Arrange your mixed berries on top of the whipped cream. You can simply pile them in, or arrange them artfully for a more polished look. If you’re using strawberries, you might want to halve or quarter them depending on their size. For an extra touch of indulgence, you can sprinkle some chopped nuts, shredded coconut, or even some colorful sprinkles over the fruit and cream. This adds another layer of texture and visual appeal. Once assembled, let the cones sit in the refrigerator for at least 30 minutes before serving. This allows the flavors to meld and the whipped cream to firm up slightly, preventing any messy surprises.
These Chocolate Dipped Fruit Filled Cones are a truly delightful treat. They’re elegant enough for a special occasion but simple enough to whip up for a weekend indulgence. Enjoy every delicious bite!
Conclusion:
So there you have it – your guide to creating these delightful Chocolate Dipped Fruit Filled Cones! I truly believe this recipe is fantastic because it offers a perfect balance of sweet, tart, and crunchy textures. The simple elegance of a chocolate-dipped cone, elevated by a burst of fresh fruit filling, makes it an incredibly satisfying and visually appealing treat. Whether you’re looking for a fun dessert for a party, a unique afternoon pick-me-up, or a creative way to use up some fruit, these cones deliver every time.
These Chocolate Dipped Fruit Filled Cones are wonderfully versatile. Serve them chilled after a meal for a refreshing dessert, or arrange them on a platter for a delightful addition to any celebration. They also make a charming, homemade gift that’s sure to be appreciated.
Don’t be afraid to experiment with variations! While strawberries and raspberries are classic choices, feel free to try other fruits like diced peaches, blueberries, or even a mix of your favorites. You can also switch up the chocolate – milk chocolate, dark chocolate, or even white chocolate all work beautifully. Get creative and make these cones your own!
I strongly encourage you to give this recipe a try. It’s surprisingly easy to make and the results are incredibly rewarding. I’m confident you’ll love them as much as I do!
Frequently Asked Questions:
Can I make these cones ahead of time?
Yes, you absolutely can! Once the chocolate has set completely, store the Chocolate Dipped Fruit Filled Cones in an airtight container in the refrigerator for up to 2 days. It’s best to add the fruit filling just before serving to prevent the cone from becoming soggy, or ensure the fruit is well-drained.
What’s the best way to store leftover chocolate for dipping?
If you have leftover melted chocolate, you can carefully reheat it. For baking chocolate, allow it to cool slightly and then store it in an airtight container at room temperature, away from heat and light. You can re-melt it gently when needed. If you used candy melts, they can also be stored and re-melted, though their texture might be slightly different upon reheating.
My chocolate isn’t coating the cones smoothly. What am I doing wrong?
Ensure your chocolate is the right consistency. If it’s too thick, you can thin it slightly with a teaspoon of neutral oil or shortening (like vegetable oil or coconut oil) per cup of chocolate. If you’re using baking chocolate and it’s seizing up, it might be due to moisture. Try working quickly and ensuring no water comes into contact with the chocolate.
Chocolate Dipped Fruit Filled Cones
A delightful treat featuring crispy cones filled with fresh fruit and coated in rich chocolate.
Ingredients
-
1 cup fresh strawberries, hulled and quartered
-
1 cup fresh blueberries
-
1 cup fresh raspberries
-
8 ounces semi-sweet chocolate chips
-
1 tablespoon coconut oil
-
8 waffle cones
Instructions
-
Step 1
Prepare the fruit by washing and drying it thoroughly. If using strawberries, hull and quarter them. -
Step 2
In a microwave-safe bowl, combine the semi-sweet chocolate chips and coconut oil. Microwave in 30-second intervals, stirring after each, until the chocolate is melted and smooth. -
Step 3
Carefully fill each waffle cone with a mixture of the prepared fresh fruit. -
Step 4
Hold a filled cone by the tip and dip the open end into the melted chocolate, allowing excess chocolate to drip back into the bowl. -
Step 5
Place the chocolate-dipped cones on a baking sheet lined with parchment paper. -
Step 6
Refrigerate the cones for at least 30 minutes, or until the chocolate has set.
Important Information
Nutrition Facts (Per Serving)
It is important to consider this information as approximate and not to use it as definitive health advice.
Allergy Information
Please check ingredients for potential allergens and consult a health professional if in doubt.